
“An Arduino based self-setting clock which can display temperature and other data from Homematic systems.
I used to have a cheap and inaccurate clock with temperature display in our living room which I wanted to replace with something with can set the time&date on it’s own as you would expect today. Also it should display my available Homematic smart-home data such as temperature sensors and other information (e.g. door bell sensor).
Since there was no such device on the market, I decided to make it myself.
I decided to use the Arduino “Mkr Wifi 1010” for this project mainly for WiFi access capability and available resources. There were a few interesting learnings which I think can be useful for others starting with the same board (see the detailed description below).
Features of my HM Clock Display :
- accurate, self-setting clock (accesses NTP internet time service to set the RTC of the microcontroller)
- receives and displays 2 temperatures (inside and outside) from Homematic (or similar smart-home systems)
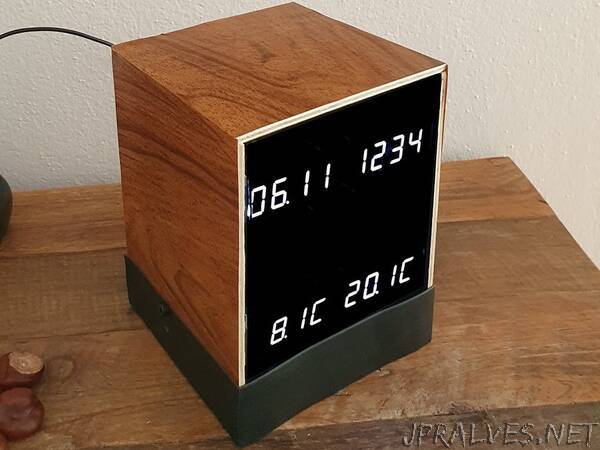
- displays time, date and temperatures on bright 7-segment-LED displays
- 7-segment LEDs will be dimmed at night time (programmable)
- an additional 8x8 bicolor dot-matrix display shows status symbols (e.g. WiFi, Temperature or NTP updates etc)
- can display additional information (e.g. I added a visual door-bell triggered from my Homematic door-bell sensor)
- can be controlled via Webpage (access in local WiFi using the IP address or router symbolic name)
- has a backup battery, measures supply voltage and battery level (remaining %) and knows when it’s USB-powered
Parts used :
- Arduino MKR Wifi 1010
- 4x Adafruit 4-Digit 7-Segment Display with I2C Backpack - bright White
- 1x Adafruit Bicolor 8x8 LED Square Pixel Matrix with I2C Backpack
- Optional : LiPo Akku with connector JST PHR-2 (3, 7 V; 1200mAh)”