
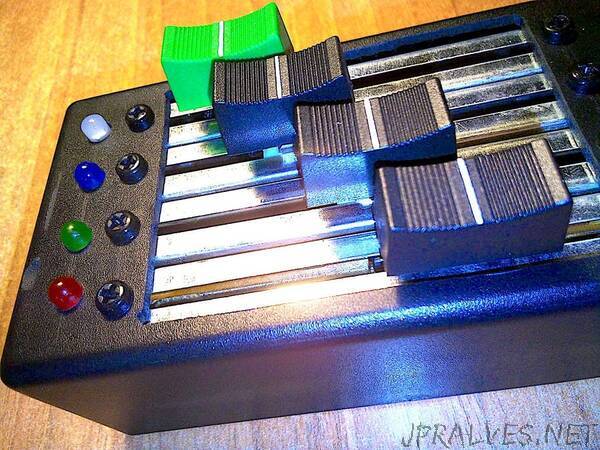
“Five channels circuit to control Red, Green, Blue, Brightness and Strobo of your LED lamps in an handy box!
In these days a complete and rich lights control DMX console is available to buy at shops for a few tens of Eur only, but we also know how is interesting and exciting to build one by ourself. Here it is mine, a basic complete circuit to control RGB (red, green and blue) lamps by the way of sliders, in a small handy box. You may also control brightness of all combinations of colours. A push button toggles RGB and STROBO mode, and with the rotary potentiometer you may change the strobo frequency rate. Coloured LEDs are just to remember the single functionality of the sliders, always on. The transparent LED is a multicolour RGB one: it varies his colour following the corresponding RGB sliders and it flashes at 4Hz if the strobo mode is active. Power up the circuit by the way of an USB cable. Connect this circuit to one or more DMX capable RGB lamp using a XLR 3 wires cable (the one used for microphones); put a 120 Ohm terminator to the last lamp.
Components List:
Arduino Nano MPU
C25B TTL/RS485 communication board
10k linear rotary potentiometer
4 x 10k linear slider potentiometers
100nF capacitor
Push button normally open
Red 5mm LED
Green 5mm LED
Blue 5mm LED
RGB 5mm LED
Resistors: 10k, 2 x 680, 120, 2 x 470, 270
25 copper rivets (for PCB pass through holes)
3 pins strip line for XLR connector
DMX (XLR) 3 pin female panel connector
USB-B female PCB connector
4 x huts for the sliders
1 x hut for the potentiomenter
1 x hut for the push button
Plastic black box 129x64x45 mm
USB cable for power
Optionals: DMX/XLR 3 wires cable and connectors male+female, 120 Ohm DMX/XLR terminator, one or more RGB lamps with DMX capabilities”