
“A project that strikes a balance between simplicity and innovation – a single-button game console.
Hello there, DIY enthusiasts and tech aficionados. Today, I’m excited to introduce a project that strikes a balance between simplicity and innovation – a single-button game console. That’s right, a gaming console with just one button. This project serves as a fundamental prototype for a compact handheld gaming device.
In this article, I’ll provide guidance on creating your very own game console. We won’t dive deeply into the code; instead, our focus will be on the fundamental steps necessary to bring this project to life.
This project has been a labor of love, driven by the desire to create a versatile prototype capable of running various games. Since the code can be conveniently sourced or generated with the assistance of tools like ChatGPT, the focus here is on building a solid hardware foundation. This console is not just about one game; it’s about unlocking the potential for multiple gaming experiences in a single device.
Furthermore, this project marks the beginning of a series of game console prototypes that I plan to develop in the future. With each iteration, I aim to explore new features, enhance the design, and refine the user experience. It’s an exciting journey that promises to push the boundaries of what’s possible in the realm of DIY game consoles. So, stay tuned for more, because this is only the first step in a series of innovative creations.
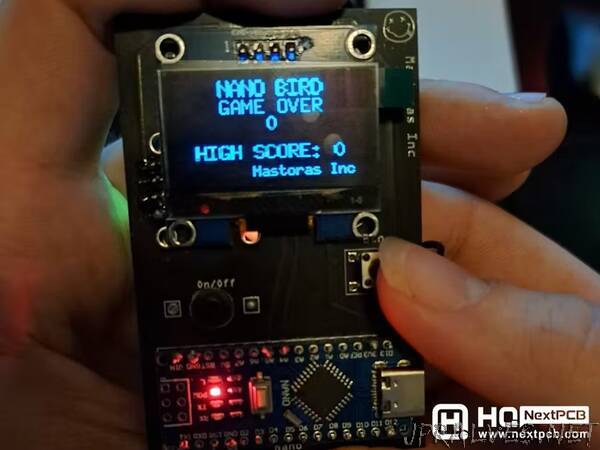
Now, let’s take a look at the essential components that drive this console. We’ll be utilizing an Arduino Nano (or an equivalent clone), a sleek 1.3” OLED display, a micro LiPo charger module, a basic push button, an on/off switch, and a 3.7V lithium battery to power the device.
Remember to verify the specifications and compatibility of these components with your project, read reviews, and check ratings to ensure you’re getting the right quality components for your needs.
This project came to fruition thanks to the invaluable assistance and support from NextPCB, a trusted manufacturer specializing in multilayer PCBs. NextPCB boasts over 15 years of experience in the global PCB and assembly industry, making it a reliable partner for projects like these. I accepted this partnership because I am familiar with their products, and I have consistently been satisfied with the quality and service they provide.
You can explore their high-quality PCBs, starting at just $1.9, and multilayer options beginning at $6.9 at the following link: NextPCB - Get a PCB Quote
As an added bonus, enjoy free PCB assembly for the first 5 boards through this link: NextPCB - Get a PCB Assembly Quote
Additionally, NextPCB offers a DFM (Design for Manufacturability) free online PCB Gerber viewer to help streamline your PCB design process: NextPCB - Free Online Gerber Viewer
Their expertise and resources can undoubtedly facilitate your projects. Happy creating!
Before diving into the final design, let’s begin with a breadboard prototype. This serves as a crucial step to verify the functionality of all components and test the initial code.
Gather Your Components and Carefully arrange them on the breadboard, making the necessary connections while keeping the wiring tidy.
Note that you can either plug a battery into the module or a micro USB cable. Use the corresponding pin (BAT or 5V).
Ensure that the OLED display initializes correctly, and your push button registers inputs.
Upload Test Code: Load a simple test code onto your Arduino Nano to check if it communicates with the display and the button as expected. This step is crucial to confirm that your hardware setup works as intended.
I am sharing my code but feel free to change it as you wish.
By taking this preliminary step, you can address any potential issues early in the project and ensure a smooth transition to the final design phase. Once you’ve validated the components and code on the breadboard, you’ll be ready to move on to designing the custom PCB for your game console.
Note 1: The code is written for the specific OLED and the specific chip it has. If you use a different OLED you will have to update that.
Note 2: You can use this website to turn any image into byte arrays so you can change what the bird looks like or add anything you want
Note 3: You can use this website to draw your own pixel art
Note 4: If you are using a clone and you are having trouble uploading the code, check this article out”