
“Touch Cam - A 3D Printed Raspberry Pi Camera
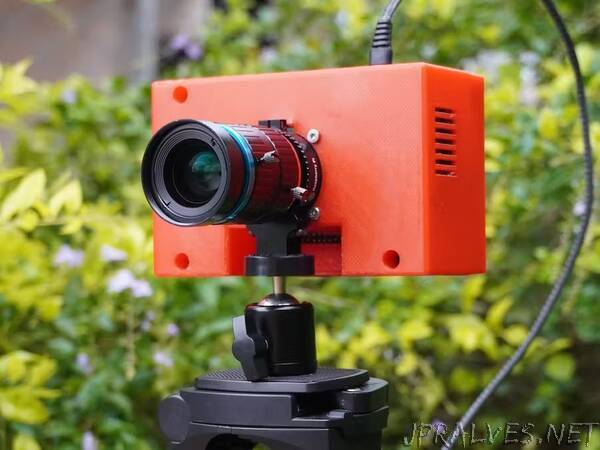
The Touch Cam is a redesigned and enhanced version of the Pi Cam - A Raspberry Pi Desktop Camera Server, integrating a touch display and touch sensor for an intuitive and interactive user experience. This project combines the power of Raspberry Pi with a custom CAD redesign and an innovative touch interface, allowing users to conveniently capture photos, videos, and time-lapse sequences.
Key Features:
1. Touch Display: The Touch Cam features a high-resolution touch display, providing a visual interface for camera controls, image previews, and video playback. With the touch display, users can easily navigate through menus, and view real-time images and videos.
2. Touch Sensor: A touch sensor has been incorporated into the design, enabling seamless operation for capturing photos and starting time-lapse sequences. By simply tapping the touch sensor, users can initiate the desired camera function, whether it’s capturing a single photo or starting a time-lapse sequence.
3. Raspberry Pi Desktop Camera Server: The project leverages the computational capabilities of Raspberry Pi to serve as a versatile camera server. The Touch Cam provides a web-based interface accessible from any device connected to the same network, allowing users to remotely control and access the camera’s functionalities for capturing photos, recording videos, and creating time-lapse sequences.
4. Cooling System: The Touch Cam is equipped with a 5V cooling fan and heatsinks to ensure efficient temperature regulation. The cooling system prevents the Raspberry Pi from overheating during extended usage, providing reliable performance and stability even in demanding situations.
5. Custom CAD Redesign: The custom CAD redesign not only enhances functionality but also ensures a sleek and functional design, accommodating the touch display, touch sensor, cooling fan, heatsinks, Raspberry Pi HQ camera module and Raspberry Pi within a compact and user-friendly camera enclosure.
6. Easy Setup and Configuration: Setting up the Touch Cam is straightforward, requiring minimal technical expertise. With clear documentation and step-by-step instructions, users can quickly assemble the hardware components, install the necessary software, and start capturing stunning photos and creating time-lapse sequences.
In this tutorial, I will provide a detailed explanation of the designing process using Fusion 360 for the Touch Cam project. Fusion 360 is a powerful CAD (Computer-Aided Design) software that enables users to create complex 3D models and designs. By following these steps, you will be able to harness the full potential of Fusion 360 to design and visualize your own projects.
Note: Feel free to further customize and expand the project description based on any additional features or functionalities you incorporated into your version of the Touch Cam or any other relevant details you would like to include.
Components:
1x Raspberry Pi 4
1x DFRobot Raspberry Pi Touch Display
1x Raspberry Pi HQ Camera Module
1x 16mm Lens or 6mm Lens
1x Touch Sensor
1x 5V 4020 Fan
1x Raspberry Pi Heatsink Kit
1x SD Card
3x M3 30mm Screws
3x M3 20mm Screws
12x M2.5 8mm Screws
6x M3 Metal Inserts”