
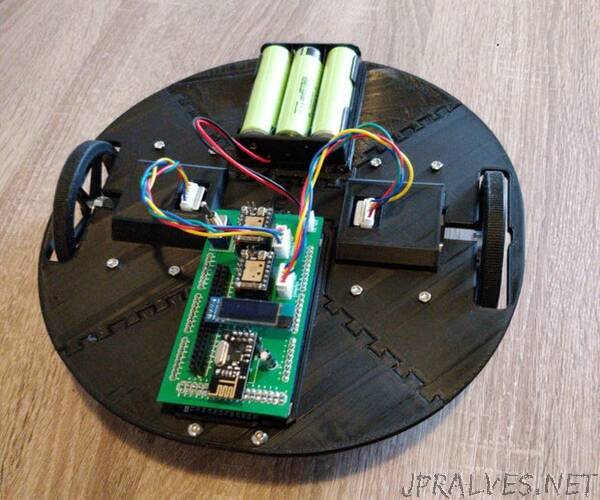
“My name is Niels Post. I am a Computer Science student from the Netherlands. This robot is part of my internship at the Vrije Universiteit Brussel. The robot is meant for use as a simple moving platform robot. It is able to drive and turn specified distances, and receive commands wirelessly. The robot is controlled through a webinterface (see picture).
The robot itself does not have any sensors on board yet, and does not know anything about its environment. To still be able to check the position of the robot, a Raspberry Pi can be used with a camera and QR codes to see the position and rotation of the robot. The raspberry Pi hosts the webinterface that can be used to control the robot, and see the live stream.
This instructable explains the following:
Building the robot
Building and flashing the firmware
Connecting the raspberry Pi
Setting up the software on the raspberry Pi
Setting up a test area
The robot is built using mostly 3D printed parts and some easily findable electronic parts. The firmware is written using the Arduino framework and the PlatformIO build system.
Supplies:
Materials / Tools:
A 3D printer (bed size of at least 230 x 230 mm)
Soldering equipment
+- 400-500 grams of 3d print filament (I used PLA)
A way to charge 18650 batteries (mini chargers can be bought for around €5)
8x M3x12mm bolts
8x M3 nuts
8x M4x12mm bolts
8x M4 nuts
Parts
2X Pololu 80x10MM wheel
2X Pololu universal wheel hub (for 5mm shafts)
2X Castor wheel (50mm height, 40 mm wheel diameter)*
3X Lithium Ion 18650 Battery
1X 18650 battery pack (for 3 batteries)
Electronics
1X Raspberry Pi with Python3 (for controlling the robot)
1X Webcam (recommended: Cybertrack H3)
1x Arduino Due (or compatible clone)
1x custom PCB: Download Gerber
1x SSD1306 display (128x32)
(optional) some rows of female headers**
2x TMC2208/9 Stepper Driver
2X NRF24L01+ wireless module
2X 17HS4401 Stepper motor
1X KCD1-11 Power switch
2X 10uF capacitor
Wires
Female-female Jumper wires to connect the Pi to the NRF
1x JST-XH 2.54 2-pin (male wire + female connector)
2x JST-XH 2.54 4-pin (female connector only)
2x JST-PH-6P to JST-XH-4P cable
*I got castor wheels at a local store (https://www.action.com/nl-be/p/zwenk-en-bokwielen/… The screw holes in the 3d print parts are measured for these specific wheels. When using different wheels, drilling might be needed in the baseplate.
** Headers make replacing components easier, but the components can also be soldered on directly.”