
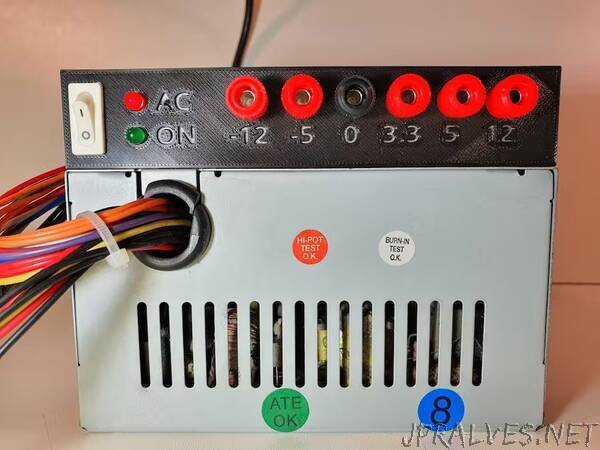
“A simple top mounted panel for re-using a discarded ATX computer power supply unit as lab bench power supply.
Computer waste is a part of the increasing e-waste problem. If you have computer parts that are still operable, recycling parts such as an old ATX power supply helps to reduce the amount of e-waste and is a fun DIY project.
You’ll need : A 3D Printer to print out the Panel. An old ATX supply, 6 Banana-sockets (standard size for panel mount), switch, 2 standard 5V LEDs+330Ohm Resistors
I used the outside wires from the long ATX connector which go to the banana terminals and did not need to open the case. I also left two 4-pin “P4 connectors” in case I want to connect any PC hardware (fans, drives etc) later.
The panel is 150mm wide which seems to be a standard size, but yours might be different. The same applies to the srew holes which hold the panel on top of the power supply.
After the power supply is switched off and completely discharged, cut the wires from the connector, group them and solder to the terminals as shown below :
- Yellow: +12V
- Red: + 5V
- Orange: +3.3V
- Black: 0V (GND)
- White: -5V
- Blue: -12V
- The green wire is used to turn on the power supply. Connect this to an ON/OFF switch (connect the green line to ground, one of the black wires).
- The purple wire provides a +5V standby signal when the power supply is connected to the wall socket. I used this line to indicate “AC on” with a red LED and a 330 Ohm resistor.
- The gray wire signals “Power Good / On” by providing +5V when switched on. I used a green LED and a 330 Ohm resistor to indicate the output terminals are enabled.”