
“Haven’ t you ever thought about controlling your PC with IoT? Our World get’ s smarter day by day and today we turn our PC in a even smarter PC than it already is. Let’ s start!
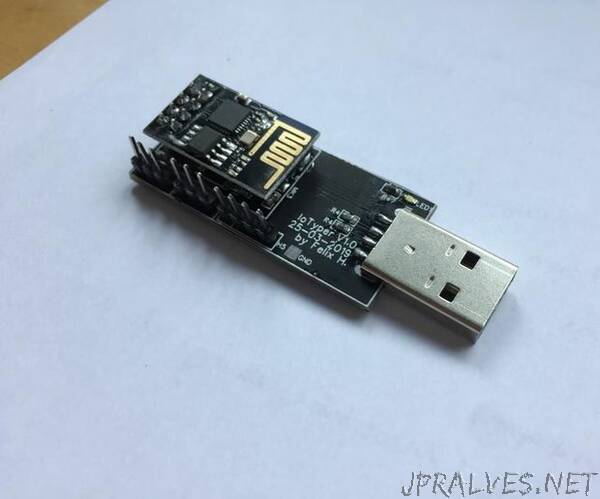
IoTyper is based on two basic MicroControllers: The ATMega 32U4 which can emulate a keyboard, and the ESP8266 that has WiFi capabilities. IoTyper combines both of them. The result is an Gate for your PC to communicate with IoT-devices. To connect everything via WiFi you need an MQTT-Broker. I am using iOBroker for this. My System runs on an old, upgraded Laptop. It doesn’ t need to be the newest and fastest! An Raspberrry Pi would do the job as well…
The principle The ESP8266 reads a variable that is stored at iOBroker. We can change that variable on many different ways, for example with Alexa ( you need a script in iOBroker that connects both together but you can find one online) or with any other Smart Assistants. Of course you can also simply use Apps like Apple Homekit to trigger an event, in this case the Unlocking of my Laptop. The ESP8266 reads the variable and sends it’ s text via Serial-Line to the ATMega 32U4. The ATMega 32U4 sends the text as an Keyboard Output to the PC. I included a test sketch for Unlocking on this page too :) This should only be an example code - The possibilities of the ATMega32U4 are incredible! You can include these skills into all of your projects to interact with your PC via WiFi!
Supplies:Let’ s start with the Materials I used:
—> Arduino Pro Micro (I desoldered the IC)
—> ESP01 —> TD6810 Buck-Converter
—> 2.2 uH Coil
—> 2x 22 Resistors
—> 2x 10k Resistors
—> 1x 680 Resistor
—> 1x 150k Resistor
—> 2x 330k Resistors
—> 1x 1k Resistor
—> 1x 100 nF Capacitor
—> 2x 22 pF Capacitors
—> 1x 10 uF Capacitor
—> 1x 1 uF Capacitor
—> 1x 100 pF Capacitor
—> 1x 22 uF Capacitor
—> Pin-Headers
—> 3x LED (Color doesn’ t matter!)
—> 1x 16 MhZ Crystal
—> USB-Male Connector
—> (Optional) Etched PCB
Tools I used:
—> Yihua 862D+ Soldering and Reflow Station
—> Solder tinn
—> Flux
—> Solder Paste
—> Tweezers”