
“In this project, learn to create a digitally-controlled oscillator or DCO-based audio synthesizer with an Arduino Nano or an Arduino Uno.
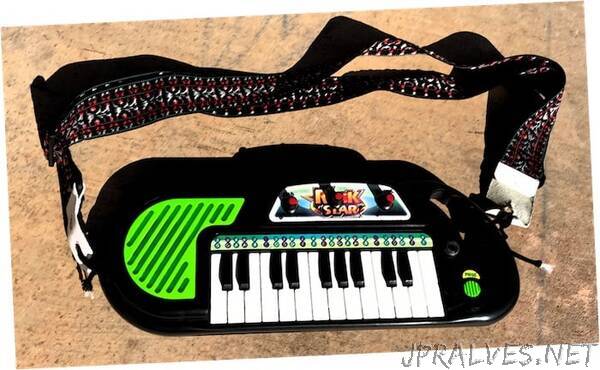
I love music, and I also love electronics. For years, I’ve been building musical electronic devices, mostly in service to my electric guitar playing. After building and modifying a few tube amps and effects pedals, I decided to branch out into the realm of audio synthesis. I’ve often dreamed of creating my own Eurorack synthesizer, one module at a time, but for my first synthesizer project, I decided to start with a stand-alone keyboard. My finished product—a modified toy keyboard
In this project, I removed the existing electronics and replaced them with a digitally-controlled oscillator (DCO)-based audio synthesizer with an Arduino Nano at its heart. Though I used an Arduino Nano, an Arduino Uno can also be used. Let’s dive into how we can make a DCO-based synthesizer. However, before going too far, let’s first talk about the use of an oscillator in a synthesizer.
The Oscillator: The Heart of Any Synthesizer
The key element of any synthesizer is its oscillator circuitry. Analog synthesizers usually have two or more independently controllable oscillators. However, anyone who has stepped into the internet rabbit hole of an analog voltage-controlled oscillator (VCO) schematics knows that they are usually complicated and cluttered. Some of the clutter comes from features that can be disposed of gracefully, such as multiple control voltage inputs. However, even when the simplest oscillator circuit is isolated within a schematic, what remains is still complicated by thermal feedback tricks to keep the oscillator in tune as its components warm up.
The complexity and clutter of VCO circuits have always been a stumbling block for me when I have considered creating my own synthesizer, and even though I love analog synthesis, I haven’t been able to get past its messy electronic underbelly. That all changed when I gained an appreciation for the Roland Juno line of synthesizers.
Roland’s Juno-6 hit the market in 1982 as a more affordable alternative to other polyphonic synthesizers available at the time. It also was the first synthesizer to utilize DCOs instead of the traditional VCOs. This dramatically improved the tuning stability of the instrument compared to alternatives because DCOs use digital circuitry to govern the frequency of the oscillator’s analog signal. With that in mind, there are certainly tradeoffs to using DCOs instead of VCOs, of course. Many folks love the “warm” sound of two slightly detuned VCOs playing in unison, which is difficult to emulate with a DCO-based synthesizer. However, modulation effects can be applied to the dry output signal from a DCO to produce lush, beautiful sounds.
Overall, the ubiquity and low cost of the Arduino Uno and Nano development boards, coupled with the fact that those digital platforms come pre-equipped with 16 MHz crystal oscillators, make creating a DCO on the cheap incredibly easy.
Creating a DCO With a Microcontroller Timer Module
Look at the datasheet for any modern microcontroller, and you will find a timer module among its peripherals. A timer module allows an embedded designer to set up a running counter in the background of an embedded system that is independent of the CPU (central processing unit). Moreover, timer modules can interrupt the CPU under numerous conditions, such as when they overflow their count register or when they reach a certain count. The interrupt conditions can be configured by the embedded designer to meet the needs of their specific application.
For this project, the timer modules of the ATMega328P—the brain of the Arduino Nano and Uno—act as the DCOs of the synthesizer. By configuring the clock source and the maximum count value for a timer module, timer module interrupts can be triggered at audio frequencies. DCO output is achieved by manipulating the GPIO pins of the microcontroller during the interrupt service routines (ISRs) for these periodic interrupts.
In the following sections, I will discuss the hardware and software design behind this project and then present some audio clips from this homemade synthesizer.”