
“In this guide we will show you how to use the ADC on your Raspberry Pi Pico using MicroPython. We will also go over some of the basic concpt
In this tutorial let’s know aboutRaspberry Pi Pico ADC, How it works, what are its uses, Pinout, and finally how to read the ADC value of it with a MicroPython example code.
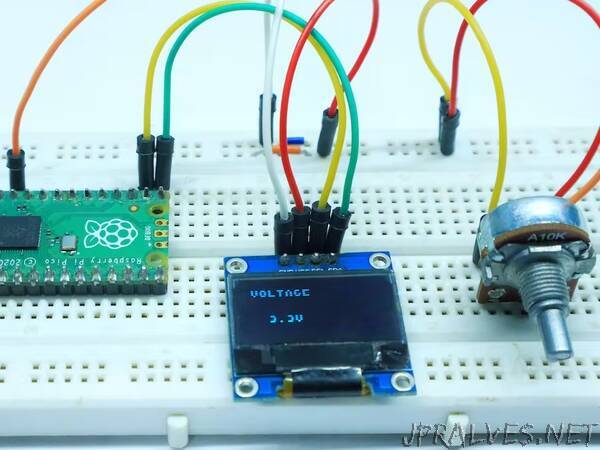
In this tutorial, we will use the Pico board to perform an ADC conversion. The Raspberry Pi Pico has four 12-bit ADC channels, but one of them is connected to the internal temperature sensor. The remaining ADC is found at GPIO26, GPIO27, and GPIO28 as ADC0, ADC1, and ADC2, respectively. Read also. Raspberry Pi Pico Getting Started Tutorial.
Hardware Required to Complete ADC on Raspberry Pi Pico
We need the following parts to complete the ADC on the Raspberry Pi Pico.
- Raspberry Pi Pico
- Potentiometer (10K ohms)
- 0.96” Inch I2C 128x64 OLED Display Module 4 Pin
- Connecting Wires
- breadboard”