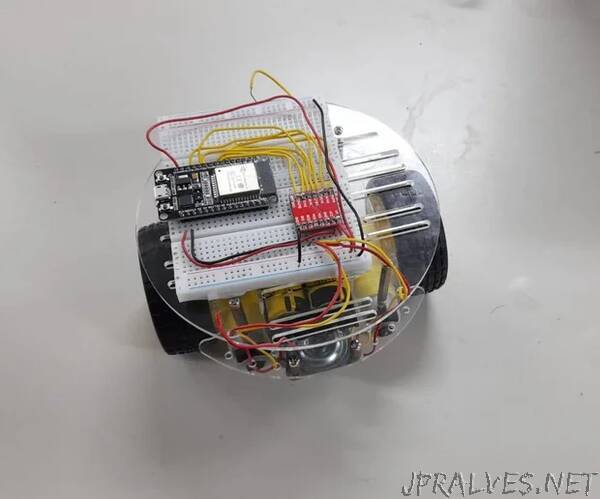
“In this Instructables, I’m gonna try to tell you how to make your robot car controlled on a website over the Internet. With this, as long as you have internet access, you can access your robot everywhere. This project has also been a learning for me to know how IoT devices work.
A little background here, All this time I want to build something that can be controlled through the internet. It’s really fascinating, the idea to control something far away from it. But, in search of building it I cannot seems to find the right source to build it. Youtube and other sites always refer me to “How to build it” instead with some kind of Bluetooth or local network. But, the idea to me is already mainstream enough and what I want is something new
In my journey of building it, I also get confused why almost in Youtube learning materials there is no tutorial about internet-based communication but when so much it comes to how to set up a Bluetooth connection or having set it up in the same area network. Of course, you can say “But you can connect them through Arduino cloud or Blynk?”. Of course, but to me in this project, you’ll learn the basics of how to set up the connection from scratch and learn lot of things regarding remote control over a long distance.
So, after finally searching the methods of how to build a low-latency remote controlled through the Internet, I finally find the answer. Which is using WebSocket communication protocol to make the communication between the microcontroller and the server. Not only that, it can be implemented in local network as well, so you can enjoy that low-latency even further.
To build this, all you need to have is some chasis robot car, an ESP-32, and knowledge about coding in implementing the server so you can deploy them(in my case I use Heroku). So without further ado, let’s go!
Note that, I assume you know basic stuff on how to set up ESP32 on Arduino UNO. Because we will use that to program our ESP32 and I will skip ESP32 setup on Arduino Uno. You can see here how to set up your ESP32 devices.
Supplies
The main component for this remote control to work over the internet is a microcontroller that has a WiFi Module on it. I use ESP32, but you can use ESP8266 or anything that has module WiFi on it.
The server and client-side control will be built using Node.js server and some basic front-end stuff. So, you need to know some basics about Javascript. But, if you knew another language program, you can make the server in your environment. In order to make it, you’ll need :
The Hardware Components
- 1x 2WD Smart Car Chassis Smart Balance Robot Acrylic Case
- 1x ESP32
- 1x TB6612FNG Motor Driver
- 7 - 12V DC power supply (2x 18650 Batteries 6000mAh 3.7V)
- Two Motors and its wheels (Included on 2WD Smart Car Chassis kit)
- 2x Breadboard
The Software Components
- Arduino IDE
- Visual Studio Code
- Heroku Account”
