
“The purpose of the article is to create the most detailed assembly instructions how to make your first do-it-yourself radiation detector
Introduction to DIY dosimeter
I bet that you have ever thought about buying a personal dosimeter to measure the level of radiation at home, while walking or traveling.
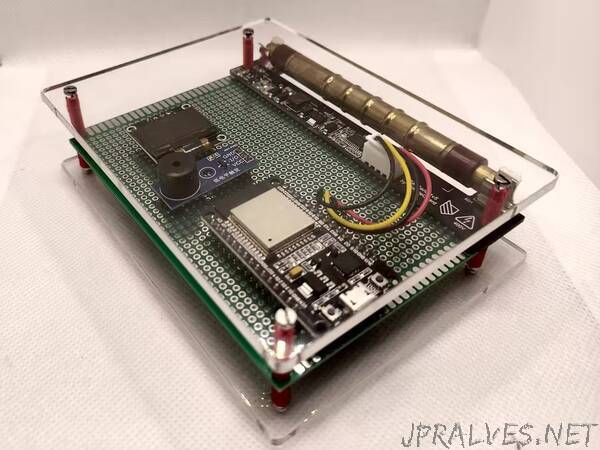
Today we will assemble a simple cheap dosimeter based on the ESP32 WiFi-controller and the RadSens board. RadSens is a ready-made I2C module for a gas-discharge Geiger-Muller counter. A reliable and widespread SBM20-1 tube will be used as a sensor. However, instead of it, any other tube can be connected to the module - J305, M4011, STS-5, etc.
The purpose of the article is to create the most detailed assembly instructions. If the youngest engineers can repeat the described steps, we have achieved the goal.
Components
The most important criteria when choosing a board and components is the cost. Our goal was to make the dosimeter as budget-friendly as possible.
The following components were used:
Dosimeter module - RadSens (from $50 om Tindie). RadSens is a ready-made module assembled with the popular SBM-20 tube. Requires nothing other than installing the library in the Arduino Library Manager. The dosimeter is ready to work out of the box.
ESP8266 / ESP32 board (from $10). RadSens module has I2C interface, compatible with Arduino, ESP, Raspberry
0.96” OLED display (from $5). You can use any screen with I2C. But the OLED screen allows you to add simple animation and color coding of the current radiation level.
Boozer (tweeter) module for sound indication of impulses (from $1). Boozer is used for user sound information when there is no access to information on the screen.
Breadboard 120*80 mm (from $2). The board is used for convenient wiring placement and organization between elements.
Total price - $68.”