
“Porting Arduboy to the ATMega4809 and making it run on a Arduino Nano Every.
Story
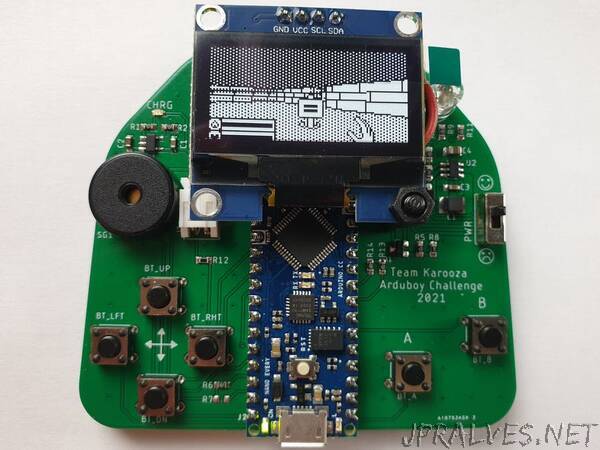
After learning about the Arduboy challenge, we (team Karooza) decided to join in the fun and port Arduboy to a new microcontroller. In the spirit of staying with true 8 bit gaming we chose the ATMega4809. This relatively new microcontroller is also used in the Arduino Nano Every, making it available to the average maker. For this very reason we also chose the Nano Every as our initial target. Then we designed a PCB which handles battery charging, boosting to 5V and breaking out the buttons, LEDs and piezo speaker. Using slightly off-center pads the Nano (with headers) can plug into the breakout board without needing to solder it (a cool idea we borrowed from the Curiosity Nano board).
The ATMega4809
The ATMega4809 sports 50% more flash memory and more than double the RAM of the original ATMega32u4. These extra resources could be used to write larger games or add additional system features like interfacing a flash chip (think along the lines of ArduboyFX) or SD card.
ARDUBOY4809 Port
As a starting point for our Arduboy4809 port we forked SLIMBOY. SLIMBOY is an Arduboy port which uses the original Arduino Nano board (based on the ATMega328p) and an I2C enabled SSD1306 OLED display. Having the Nano pin-out in common, it seemed like a good place to start from.
Additionally we also ported ArduboyTones to work with ARDUBOY4809. This gave us some more sound capabilities and support for more games.
OLED Display
Another nice feature of the ATMega4809 is that it supports Fast Mode Plus I2C, meaning it can clock the I2C bus at up to 1MHz. We utilized this mode to squeeze out some additional frames per second.
Furthermore we noticed that most SSD1306 I2C displays typically came in 0.96” size but also wanted to enjoy Arduboy games on the larger 1.3” displays. So we also added support for the SH1106 based displays which was much easier to find in 1.3” size.
Building your own
If you are interested in giving ARDUBOY4809 a go the easiest option would be to first build it on a breadboard. The more adventurous builders could use our Gerber files to have the PCB manufactured and solder the components (which is mostly surface mount).
Breadboard: Since we derived ARDUBOY4809 from SLIMBOY you could use the same breadboard layout that it uses with only one small change. Instead of using pins D9 and D11 for the piezo speaker, use pins D9 and D10. With the breadboard version you can decide how you want to manage powering the board. You could just use the USB power or add a separate battery and boost it to 5V.”