
“A smart watering system that automatically waters a plant.
Story
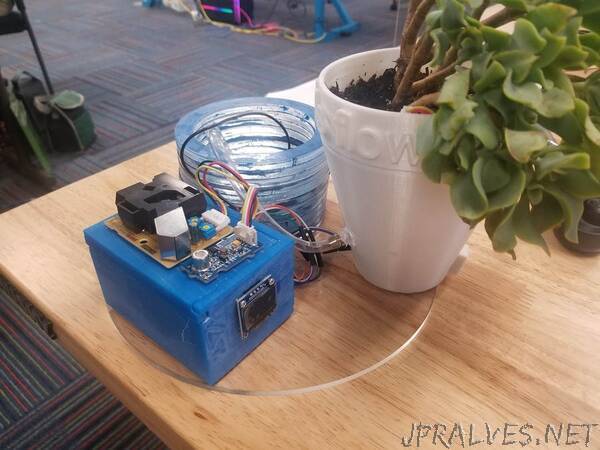
For this project, we had to include a set of components we had needed to include: The BME280, Seeed Grove Dust sensor, Seeed Grove air quality v1.3 sensor, Capactive soil moisture sensor, Adafruit 128x64 oled display, a relay, and a particle argon.
For my design, I wanted a setup that was clean-looking and more refined. I had wanted a box and flower pot setup that sat on a reservoir but ended up changing that to everything resting on a circular disc of acrylic. For the box, I modeled it and the lid in Autodesk fusion 360 and printed them out with the Formlabs 3 Resin printer. For the flowerpot i, I had modeled it in Fusion 360, too, and printed it out with the Ultimaker 3 3D printer. For the reservoir itself, I used leftover acrylic discs that happened to work perfectly for the project!
The Goal of the project was to have a tidy automatic-watering flower pot that could be controlled through the web. With roughly a total of 8 hours of work it was complete, but the actual printing of everything took longer than that. The pot took roughly 23 hours, the box took rougly 3 hours on the resin printer, and the reservoir took roughly 2 hours to let dry.
The BME280 was mounted inside the flower pot along with the soil moisture sensor. The Particle was set inside the box with the relay, with the display screwed to the outside case, the motor was set inside the reservoir, and the air quality sensor along with the dust sensor were hot glue to the lid of the case.
For the case, I had wanted an easily accesible port for the Particle argon, a lid that was easy to remove but also could be held in place, a pass-through that allowed for all the wires, the relay to mount inside above the breadboard, and the dust sensor/air quality sensor to both be mounted on the lid so that they were able to read the air more accurately.
For the reservoir, I had initially wanted both the box and flower pot to be mounted on top of it, having a diameter of ~6 inches. That changed due to usage of materials, and I had found discs of acrylic that were waiting to be used by something, all with a 4.5 inch diameter. I changed it to be double side taped to a larger disc of acrylic that was 9 inches in diameter and for the 4.5 inch circles to be stuck together. I had though about using silicone but decided that it wouldn’t give the necessary adhesion for the acrylic so I ended up using automotive RTV, which allowed for a water-tight seal and also be able to effectively glue each piece together.
For the flower pot I had wanted the water-supply to come from the side, with a small spicket that allowed for more even distribution of water for the soil moisture sensor to more accurately read the soil. I had drilled two holes into the pot, one for wires from the soil sensor and on on the side for the coupling of the hose. I hot glued the wires and coupling to hopefully create a water-tight seal, but ended up having to use bathroom silicone to seal them both so that they didn’t leak!
All in all, this project was definitely a learning experience for me, mostly to not rush and keep all of my parts together, (I left the flower pot in my car and the abs deformed from the New Mexico heat) which will come in handy for later. Thank you for reading through this and I hope you’re future projects go well!”