
“Check out how you can use the famous XMC4700 to make a mechanical 7 Segment Display!
0 Greetings!
First of all, the idea to create a 7 Segment Display this way was inspired by MichaelKlements (click to watch the video on his YouTube channel).
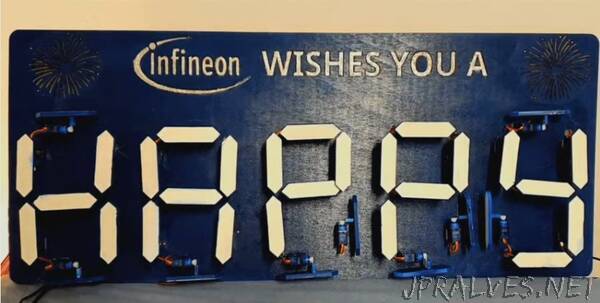
Greetings, fellow makers and tech enthusiasts! Are you ready to ring in the new year with a thrilling project that combines Infineon’s XMC4700 Relax Kit, servo motors, and 3D-printed parts? Then buckle up and get ready to build a mechanical 7-segment display that will add a touch of sparkle and fun to your celebrations. This project is not only a great way to showcase your skills and creativity, but it’s also a perfect opportunity to impress your friends and family with a unique, hand-crafted display that will make your New Year’s Eve party truly unforgettable. So grab your tools and let’s get started!
1 Foreshadow & Concept
The plan is simple: print out the segments using a 3D printer and paint them the same color as the board. Then, use hot glue to attach them to the arm that comes with the SG90 servo motor. Glue the motor on the 3D spacer and place them on the plywood board in their corresponding orientation to create a 7-segment letter or digit. Repeat this process multiple times to create a whole display. Finally, connect the servo motors to a power source and the XMC4700 Relax Kit board to move the 3D-printed segments to either blend in with the board (hide mode) or create a contrast for visibility (show mode).
Why the XMC4700 Relax Kit? It has 23 PWM pins, perfect for controlling the servo motors. Follow the step-by-step instructions below to create your own dazzling display.”