
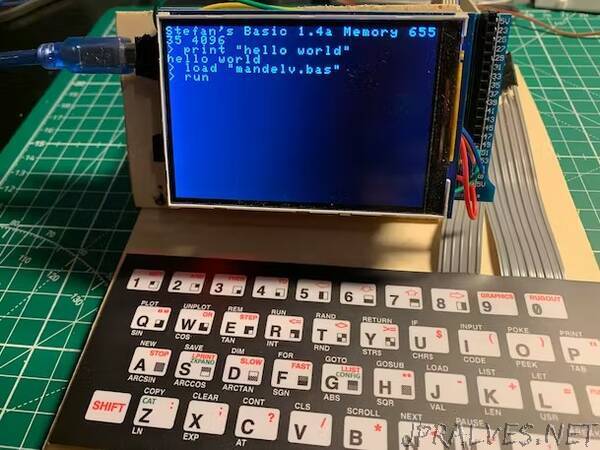
“This is another retro compute project. Use an Arduino Mega256, 64kB serial RAM, a display and a keypad to build a standalone computer.
The idea
I had the idea to build a standalone computer resembling the old ZX81 computer when I first save that the ZX81 keyboards are still for sale at a reasonable price.
Some call them the worst keyboard ever. The old ZX81 home computer was a super low cost machine. I never had one back then but friends of mine did. I admire the machine from the engineering point of few. They build a fully functioning computer for a low price by making the most of the components.
I thought it would be worth to give it a try myself and start out with really low cost components. One is the keyboard.
The other low cost components I played around with are the ILI9486 displays for Arduinos.
They have a parallel port and use a lot of pins. On an UNO they cover the entire surface and there are no more pins left. On a MEGA they are also tricky to use. More about this later.
The ILI9486 cost around 15 Euros and are very common. The ones that come on the market in Ebay sometimes have pixel errors.
As the display and the keyboard need a lot of IO pins, an Arduino MEGA is the ideal basis for this system.
Why BASIC?
The computer I am going to present here will be using BASIC. Why an outdated language from the 80s?
BASIC is an interactive language. Many of the simple physical computing applications we create on Arduino can be build with it faster than in Arduino’s native C++. One can play with circuits, test interactively and finally run he program when everything is tested. The need for compile and upload is gone.
As the language is small, it runs on an UNO just as well as on bigger RP2040 based systems. The core layer of the BASIC interpreter masks the hardware and library complexity and differences of the different Arduino platforms.
And then, retro computing is fun.
Structure of the tutorial
Most of the tutorial will be on integrating the components independent of the BASIC language. I hope it will also be useful for many readers.
The tutorial uses a step by step approach coming from the simple and easy to do to the more complex.
We will first upload the BASIC interpreter, connect the display and showcase the display capabilities.
An SD card for file storage will be connected next. This requires some tweaking of the libraries.
Connecting the keyboard will require some mechanical and electrical work. This is explained in the next section.
With the keyboard connected, the little computer will be standalone. It can run and be useful without help from a bigger machine. It has 6 kB of useable BASIC memory. This is far more than the original ZX81 with it 1kB. It also has 16bit graphics with a resolution of 480x320. Home computer user could only dream of it back then.
These first steps are easy to do and don’t require complex electronics or software work.
The last step is the memory extension. This will use 64kB serial SRAM chips and a prototype board. This is the hardest part of the tutorial as it requires soldering and some electronics skill.”