
“A carousel that automatically rotates to face the nearest person. Put a phone, fan, or anything you want to face at you on top!
When I’m cooking or cleaning I’ll often watch shows on my tablet, but I’ll be moving around the kitchen and my hands are often full or dirty so I can’t keep the display in view easily. I have a similar problem at my desk, where I have a fan that I’d like to keep pointing at my face as I type. With those situations in mind, I decided to create a stand that you can place an object on, and it will always rotate to face you. This project guide shows you how you can build one too, for around $50, with no soldering!
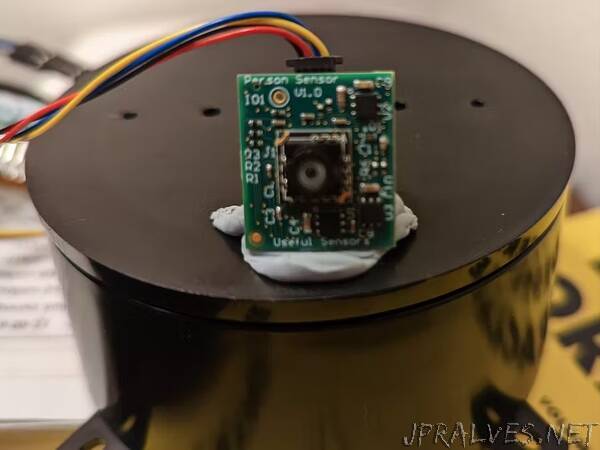
The brains in this device come from a Person Sensor, a small, low-cost hardware module that detects nearby peoples’ faces, and returns information about how many there are, where they are relative to the device, and performs facial recognition. It is designed to be used as an input to a larger system, and this example shows how to use it to control a servo-driven carousel.
The first step is assembling the materials. You should be able to use any servo and housing as alternatives to the exact models listed in the BoM, these were just chosen because they are easy to assemble. You can also use a regular Pico and solder on the headers yourself if you don’t have a Pico H.
Next, put together the carousel itself.
- Unscrew the default horn from the servo if one is attached.
- Screw the servo into the carousel base.
- Place the ball bearing into the depressions in the top of the base.
- Connect the rotating plate onto the servo shaft, and screw it in.
- Plug the three M/F jumper wires into the servo cable.
- Wire them into the right pins on the Pico:
- Black (GND) should go to pin 3.
- Red (5V) should go to pin 40.
- Yellow (DATA) should go to pin 1.
There’s a full wiring diagram below.
Wiring up the sensor requires 4 jumpers, to connect VDD, GND, SDA and SCL. We’re using I2C port 0, which on the Pico is assigned to GPIO4 (SDA, pin 6) and GPIO5 (SCL, pin 7) in software. Power is supplied from 3V3(OUT) (pin 36), with ground attached to GND (pin 38). If you’re using a Qwiic connector, the colors will be black for GND, red for 3.3V, blue for SDA, and yellow for SDC. It’s the same setup as the introductory Person Sensor CircuitPython sample code.”