
“Let’s take a break during navigation while Autopilot follows the route, control it with remote control. Project contains many improvements!
The new autopilot:
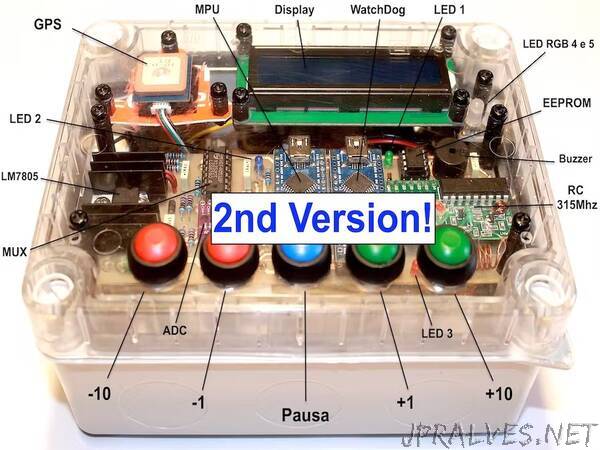
Hello! Coming from the experience of the first version here it is the second one. The circuit is much more robust and solid (the Uno wafer style was a nightmare…), I added an ADC controller for current absorption calculation, there are two separated voltage regulators for 5V: one for the circuit and a bigger one for the stepper motor. I introduced PID algorithm (Progressive, Integrative, Derivative) so we can modify the behaviour, the responsiveness, of the autopilot, smooth or aggressive. The setup menu is much richer to personalise the autopilot.
I suggest to read what I wrote for the first version at this link then come back here to enjoy the new one. I prepared for you a full schematic diagram, some flow charts for the software, and circuit block diagram. To connect the top to the bottom PCB layers I used around 50 copper pass through rivets to solder.
To complete the autopilot box you could add the battery Li.Po. charger circuit I made for this project, it fit it perfectly. Please go to the charger project for all instructions and details at this link.
To use watchdog function in the Watchdog MCU you must update its bootloader because the original one got a bug. Could be that your Arduino Nano is already updated, may be not.”