
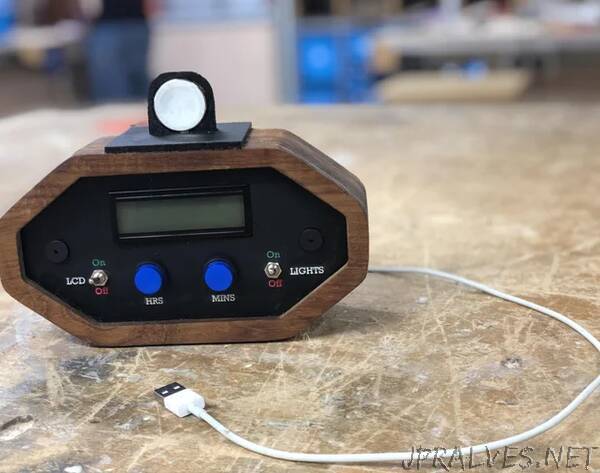
“In this tutorial, I will be walking you through the steps of building an Arduino alarm clock with an apple watch charger from scratch. Since I am building this from scratch, the process of building the housing for the circuit requires some machinery that cannot be found in everyday households (e.g Laser cutters, CNC machines, and 3D printers). That being said you can always still use the circuit and code while making your own housing for the product.
I made this as a school project. Having already looked online for code and tutorials on how to make an alarm clock I found that once I followed all the steps, the clock never seemed to work, some seemed too complicated and others unfinished. As a result, I decided to try and code my own clock from scratch without using an RTC, This clock uses the millis() function instead.
Disclaimer: I’m sure that my code will not be as efficient as it should be since I am not an expert in the field. I have experienced several issues throughout the building process that I am sure you may face as well. To try and prevent this I have included some tips that helped me.
FYI - The step file attached below is the CAD file for the project with all the measurements and components.
Supplies Needed
- Teak 20mm sheet & 15mm sheet
- Acrylic 3mm Matte black sheet
- Black PLA for 3D printing
- Arduino Nano
- Jumper wires (around 25-35)
- 2 x 5-volt piezo buzzers
- 2 x basic small pushbuttons (any will work)
- 2 x LED Push Buttons
- 2 x Toggle switches
- 1 x Rocker switch
- 1 x RGB LCD (RGB if you want it to change colors)
- 4 x small perf-boards (around 4 x 3 cm, you can cut them with a guillotine)
- 1 x Female USB part
- 1 x apple watch charger
- 1 x Any old 5 volt USB cord that has a positive and ground wire
- 6 x M4 countersunk wood screws
Equipment Needed
_(Note: Not all the equipment is essential as it can be easy to find alternate ways to complete some tasks)_
- Soldering Iron
- CNC Machine (Method of cutting wood accurately)
- 3D Printer (For the watch housing)
- Laser Cutter (To cut acrylic)
- PCB Guillotine (To cut perf-boards)
- Hot glue gun (to glue circuitry in place)
- Epoxy Resin (to glue acrylic to wood)
- Wood glue (For wood to wood connections)
- Hand drill (4mm bit and a countersunk bit)”