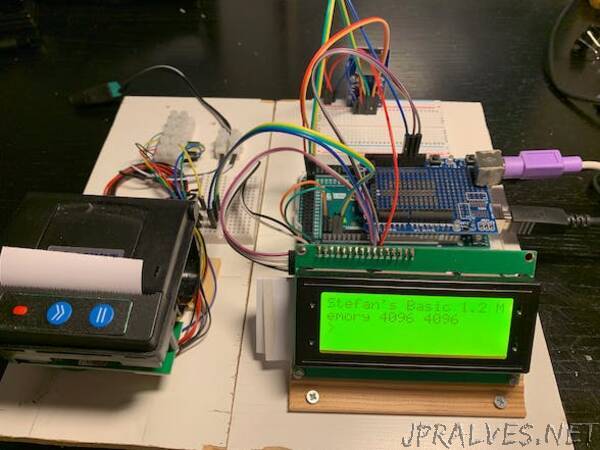
“AIM65 is a legendary single board computer from the 70s. I build on from scratch using Arduino standard components.
The idea
The Rockwell AIM 65 was one of the early 6502 based computers of the 70s. It had a 20 character display, a little thermo printer and a fairly big keyboard. Standard memory was 1k or 4k. More details can be found on the “old computers” page. A lot of software was available on ROM. I never had an AIM 65. They were popular a bit before my time actually. But I always liked the barebone look of it.
Prepare the prototype shield
Solder the PS2 keyboard socket on the outer side of the prototype shield. Then connect the wires. My layout is to use pin 2 of the Arduino for the PS2 clock and pin 3 for the PS2 data line. Pinouts and instruction can be found following this link https://www.pjrc.com/teensy/td_libs_PS2Keyboard.html. My very messy experimental prototype looks like this
Please make sure that you get the pinout right. PS2 keyboard can be fried easily with the wrong polarity. Download the PS2 library.
Paul Stoffregen’s PS2 library is supplied through the Arduino IDE for download. The latest version is 2.4. This library has a bug in handling keymaps with altgr keyboard maps like German. I fixed the bug in my fork if the library https://github.com/slviajero/PS2Keyboard. Paul has included the fix also in his source but the code from the Arduino IDE still may be the old one.
Mount and connect the LCD display
Stefan’s BASIC supports I2C and directly attached 20*4 LCD displays. For my first prototype I used a display with a parallel interface which leads to a lot of cables and breadboards. I2C is the better option. Still, the parallel display code is still in the interpreter as it is also used for LCD shields.
Connect the I2C and voltage wires to the Arduino. I used a small breadboard because I want to use the I2C interface not only for the display but also for the other sensors.
The upper two connectors are ground and 5V. This goes to the prototyping shield and the respective sockets. SDA and SCL are connected to PINs 20 and 21 of the Arduino MEGA.
Put everything together and upload the software.
Put the prototype board on the Mega, plug in the PS2 keyboard and the USB cable. I mounted everything on a plywood board screwing the MEGA on its little plastic bed on the board.
Load the BASIC interpreter into the ARDUINO IDE. You need the sketch TinybasicArduino/TinybasicArduino.ino from my repo https://github.com/slviajero/tinybasic including hardware.h and basic.h. Make sure to load the PS2 library in the Arduino library manager.
Set the following language settings at the beginning of TinybasicArduino.ino the code. The control which language features are included.”
