
“MQTT on Raspberry Pi (part 3): sending sensor data from Raspberry Pi Pico to HiveMQ Cloud and show it on a JavaFX dashboard
In the second post of this blog series, we used Java on the Raspberry Pi mini computer to send sensor data to HiveMQ Cloud, and visualize it on a dashboard. In the third blog post of this series, I am going to add some more data to the messaging system with another member of the Raspberry Pi family, Raspberry Pi Pico.
Introduction to Raspberry Pi Pico
In January 2021, the Raspberry Pi Pico was introduced. This is a completely new type of board as it’s not a full Linux PC, but a microcontroller chip (RP2040) developed by Raspberry Pi itself, on a small and versatile board.This RP2040 features a dual-core Arm Cortex-M0+ processor with 264KB internal RAM and support for up to 16MB of off-chip Flash, combined with a wide range of GPIOs (supporting I2C, SPI, and Programmable I/O (PIO)).So it’s comparable to an Arduino or similar microcontroller board. But the biggest surprise of this Pico: the price of only 4$!
The Raspberry Pi Foundation made sure a very extensive documentation sitewas available when the board was launched. Programming can be done with a C/C++ and MicroPython SDK.
The Pico provides a lot of GPIOs which are grouped very nicely by separating them with a ground connection. These grounds even have a different shape on the board (no rounded corners), to make it easier to find the correct pin you want to use.
The Pico project
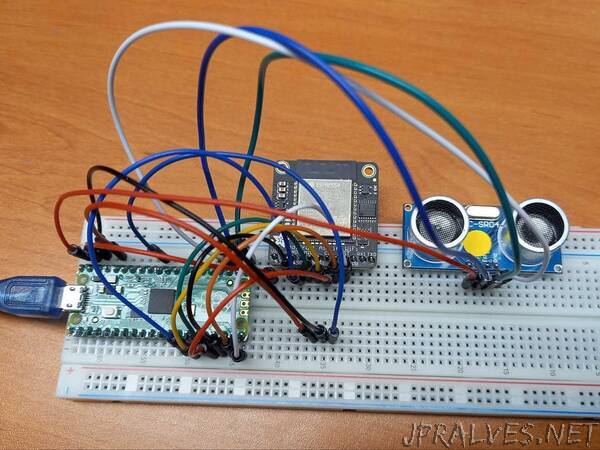
For this post we will extend the Pico with a WiFi module and one distance sensor, as an example how you can easily send sensor data to HiveMQ Cloud from this inexpensive board. To achieve this very low price, the Pico doesn’t contain wireless functions. Luckily there are different possibilities to add WiFi to the Pico, of which the Adafruit AirLift ESP32 WiFi Co-Processor Breakout Board is probably the easiest and cheapest at 9.95$. An extra advantage of the Adafruit products is the big amount of documentation they provide on their website. Most of these examples use a different “flavor” of MicroPython, called CircuitPython, which is based on the same Python implementation, but more focused on beginners, education, and getting started tutorials.
The project in this post is a combination of different examples from Adafruit:
- Connecting to a MQTT Broker
- Getting Started with Raspberry Pi Pico and CircuitPython
- Quickstart IoT - Raspberry Pi Pico RP2040 with WiFi
- Python & CircuitPython
- Installing the Mu Editor”