
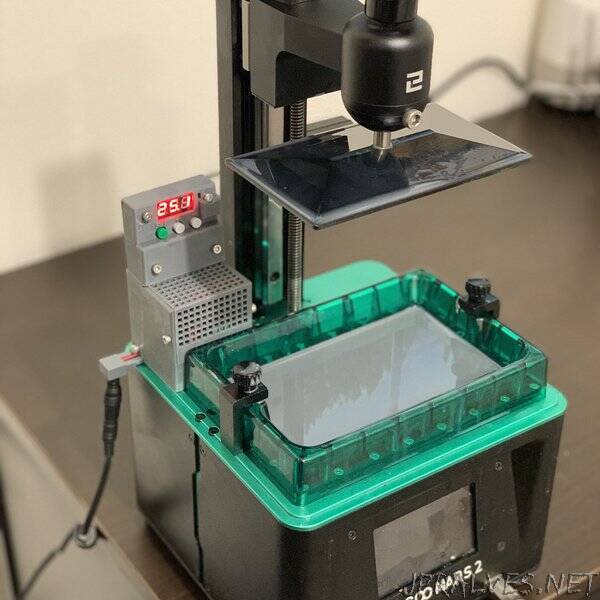
“This heater allows small machines such as the Elegoo mars to print with engineering resins like Siraya Tech BLU or specialty resins.
Engineering resins require higher than ambient temperature to print with, 25 C is the bare minimum while optimal results require around 30 degrees. There are a couple of solutions on the market today, but all other chamber heaters are too large to fit the standard small printer. Other solutions such as putting a heater mat below the printer or putting a space heater in the room with the printer are extremely slow, taking around an hour or more to get up to temp. This resin heater can preheat the chamber to 10 C above ambient temperatures in around 12 minutes and reach a max temperature of 15 C over ambient in 45 minutes. It produces around 35 watts of heat and requires nearly no modifications to the printer itself, aside from trimming the rubber gasket of the enclosure. This is an experimental device that is offered without warranty and we are not responsible for any damage that could be caused by the creation or usage of this device.
The device uses 120 C PTC heater elements for safety and to prevent overheating. The 3D printed parts are printed with a 50/50 mix of Blu and Sculpt by Siraya Tech to give it both strength and high-temperature resistance.
The W1209 is used for precise temperature control and according to the probe on my multimeter, it maintains the chamber to around +/- 1 C of the set temperature.
This project is shared under Attribution-NonCommercial-ShareAlike 4.0 International.
KIT:
A kit containing all the needed parts will be offered next week on Amazon. Basic soldering and assembly skills are required to assemble the kit.
ASSEMBLY INSTRUCTIONS ARE A ROUGH DRAFT AND WILL BE UPDATED FOR CLARITY WITH PICTURES
Assembly Instructions:
1. Scew in 3 of the 55mm screws into the bottom row of holes on base unit
2. Install each PTC heater units by resting it on the bottom screw then inserting the screw above it to secure it in. Repeat for each heater unit
3. Thread the wires through the gap in the screw and out the rear top of the unit
4. Slide the fan into the base of the unit and slide the wires through the gap behind the PTC heaters
5. Insert the thermistor into the slot in the base, a 4mm thermistor should be used, larger ones will not fit. Thread the wires through the back
6. Solder a connection between the two innermost terminals of the W1209 module
7. Trim the thermistor leads and solder them to the back of W1209 module (upper right corner)
8. Screw the thread the 5.5mm jack into the plug adapter, then screw that into the side of the base.
9. thread the power cables through the notch in the rear of the base unit
10. Trim and strip all wires, insert 3 of the PTC leads into the negative terminal, and 3 into the terminal at the farthest left location(this is controlled by the relay). Solder might be required to join all the wires together
11. Insert in the front mesh and screw in using the two side screws
12. Press W1209 into the PCB case, screw the PCB case into the base, and fasten the backer in with the 20 and 24mm screws
13. Plug the device into the wall and check that the heater is working correctly
14. Apply the thin strips of adhesive foam to the bottom of the base
15. Install the finished unit into the rear left of the printer
16. Mark where the plug adapter hits the rubber gasket and trim the rubber gasket at that location
17. Congratulations!!! You have the heater unit installed, temperatures can be set by clicking set, then the + or - buttons!”