
“Use the latest ATtiny processors in the Arduino Environment. These have the memory capacity of ATmega chips in smaller and cheaper packages.
You may be familiar with the ATtiny series of microprocessors from Microchip such as the ATtiny85 or ATtiny2313. These chips powered small systems like the Digispark series. Unfortunately, they had limited Flash (usually no more than 8K) and even more limited RAM (usually less than 1K).
Now a new series of ATtiny chips are available with more memory and functionality. They even compete with the more expensive and larger ATmega range of chips. The ATtiny1614 that I will be looking at has 16K Flash Memory and 2K RAM in a 14-pin SOIC package.
Using a breadboard
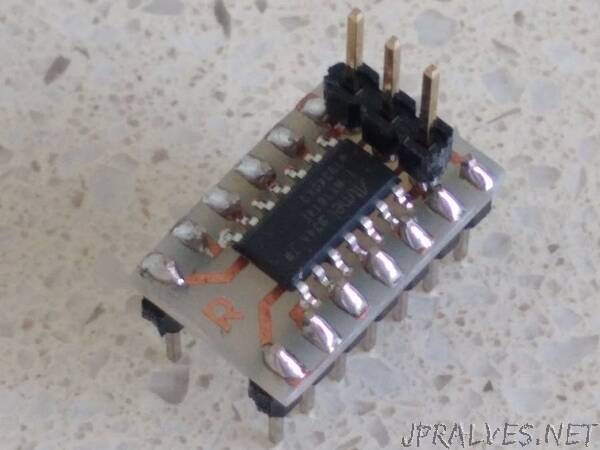
One of the problems with experimenting with these new chips are that they only come as Surface Mount Devices (SMD). This makes it hard to use on a breadboard. I have made a simple adapter board that allows a ATtiny1614 chip to be used as standard Dual-In-Line (DIL) device.
The Eagle files have been included should you wish to get the adapter board commercially made or you can make it yourself. I made mine using the Toner method. Note: The DIL pin layout differs from the SMD pin layout. I did this on purpose so I could use a single sided PCB and keep the 0.3in width. The 0.3in width was important so that the adapter can plug into a standard 14pin IC socket. The UPDI/RESET, VCC and GND pins have there own separate header so that a programmer can be connected to the board even when the adapter has been soldered into another PCB.”