
“Inspiration
Having a friend with an interest in cryptography and security, I wanted to create the perfect birthday present.
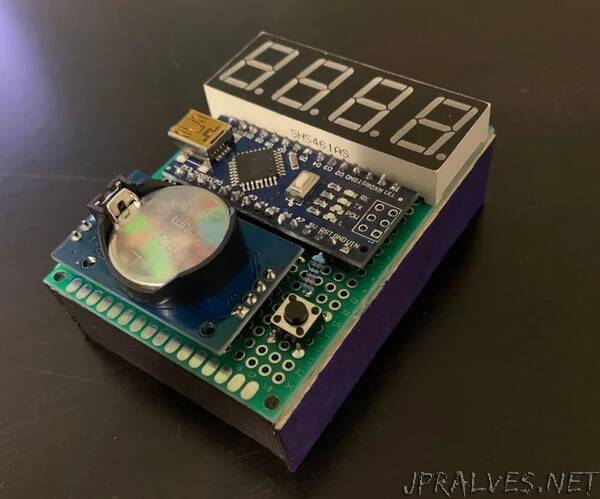
*This is a project I made as a birthday present and was created within tight time constraints (pardon the messy workmanship)
NOTE: The TOTP generation which is used in this project generates and utilizes 6 digit codes, but due to my current on-hand hardware, I opted to cut the trailing 2 digits and display and utilize 4, arguably (but not greatly) reducing the security.
General Information
This project generates a new code every 30 seconds using a preshared key and the current time (which is kept track of using the real-time clock module) and displays it on the display when the button is pressed. The most common use case would be two-factor verification based on Time-based One Time Password (TOTP) and HMAC-based One Time Password(HOTP) for authentication.
TOTP is an algorithm that computes a one-time password from a shared secret key and the current time. HTOP is an algorithm that uses the HMAC algorithm to generate a one-time password.
Companies such as Google, Microsoft, and Steam already use TOTP technology for their two-factor authentication
Interesting Links
Article explaining how Google uses this technology to authenticate users - https://medium.com/@tilaklodha/google-authenticator-and-how-it-works-2933a4ece8c2
JavaScript implementation of HOTP and TOTP that may be used when creating software utilizing this project - https://github.com/jiangts/JS-OTP
Crytographic library for Arduino used in this project - https://github.com/maniacbug/Cryptosuite
TOTP Paper - https://tools.ietf.org/html/rfc6238
Level of Expertise
This Instructable is for enthusiasts that are interested in security and may want to implement a nice hardware component to the generation of their TOTP. This instructable is written for an audience that already understands the basics of interpreting electronics diagrams and rudimentary programming, but if you plan on simply following this Instructable exactly, don’t worry if you have no experience, and feel free to ask questions down in the comments! Furthermore, the project can be interesting for more experienced makers as well since the final product is not only a nice piece to have around (in my opinion), but has so much potential for expansion and new features without much hassle.
Supplies:
Materials:
1x Arduino Nano (Amazon)
1x DS3231 AT24C32 Real-Time Clock (RTC) Module (Amazon)
1x SH5461AS Common Cathode 4 digit 7-segment (Amazon)
1x Pushbutton (Amazon)
1x 10k Resistor (Amazon)
OPTIONAL 1x 5x7cm PCB (Amazon)
OPTIONAL Wire for soldering to PCB
OPTIONAL 1x Breadboard for testing (Amazon)”