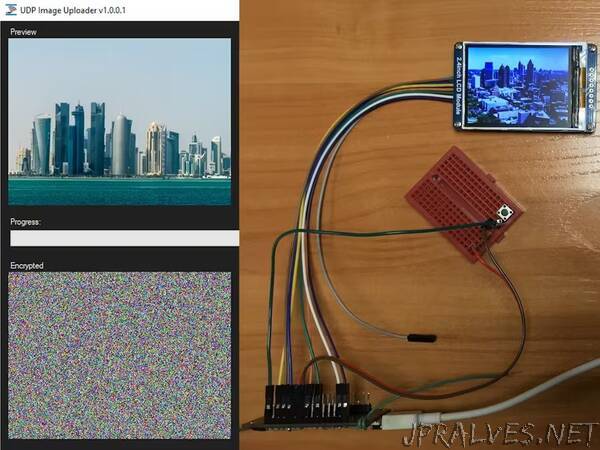
“Learn How to Use the UDP Image Uploader Software with Serpent Encryption Algorithm in CBC Mode
In this tutorial, I will demonstrate how to transfer an encrypted image from your PC to the display connected to the microcontroller via Wi-Fi using the UDP protocol.
Supplies
- PC x1
- Wi-Fi Access Point x1
- ESP8266 x1
- 2.4 Inch TFT LCD with ILI9341 x1
- 4.7k resistor x1
- Button x1
How It Works
UDP stands for User Datagram Protocol. It is a simple and connectionless protocol used for sending data over the network that does not guarantee the delivery of packets. I have chosen UDP over TCP because it is faster. Before encrypted data can be sent over the air, a common encryption/decryption key must be established. In this tutorial, I’ll call it the “Security Key” for convenience. It is also necessary for the software on the PC to know the IP address and the UDP port of the receiver board. Once these three variables have been set up, you can finally send an image. To do this, select an image you want to send, and the software on your PC will frame it into a 320x240px picture box.
When you are done adjusting the image and press the “Send Image” button, the software takes the first row of the image from the picture box. It extracts red, green, and blue (24-bit) 888 color values of each pixel and converts each pixel into (16-bit) 565 colors. It then splits each 16-bit color value into two 8-bit ones and adds them into an array. The resulting 640-element array is passed to the Serpent encryption algorithm that works in CBC mode. When Serpent gets that array, it encrypts it and puts the ciphertext to the array that can be accessed by the functions that send encrypted data to the ESP8266. When the sending function does its job, ESP8266 receives a 656-byte long packet (16-byte encrypted IV + 640-byte encrypted row), decrypts it, and displays the decrypted row on the LCD with ILI9341 connected to the ESP8266.”
