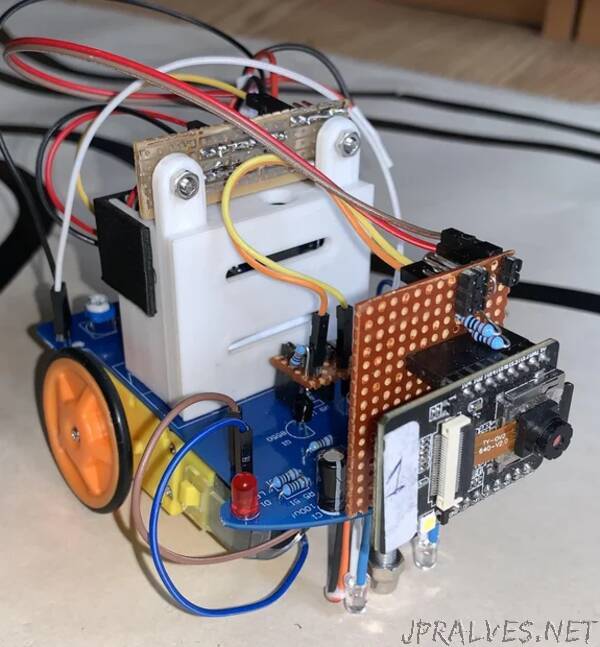
“The line follower robot is a basic step in robot construction and the cheapest construction kits offer an introduction which can operate as intended, or as documented here, be upgraded to something more sophisticated.
This is an instructable to demonstrate the use of the L0Cost robot controller in building a mobile robot which can be steered with a Bluetooth controller or via a web page with video feed. It uses the L0Cost Robot Controller software held on Github here.
Even if you don’t add the controller, it’s a walk through of building the basic line follower. Building the line follower is steps 1-12, if you want to skip forward to the L0Cost controller then its from Step 13 onwards
Supplies
- Line follower robot kit
- 4 x 75R resistors to replace the 4 x 51R resistors in the kit
- 2 x 4k7 resistors to replace the 3k3 resistors in the kit
- 4 x 330R resistors for the interface adapter
- 1.5mm or 2mm heat shrink sleeving, various colours if possible but not essential.
- ESP32-CAM with psram
- ESP32-CAM-MB to help program the ESP32
- 3xAA battery holder if you don’t want to make the battery box and display.
- dupont pcb headers and sockets, need 2x3 pin sockets, and 14 pins.
- dupont patch leads
- 3D printed plastic frames - though possible to make out of other materials
Tools
- Soldering iron with solder
- Small wire cutters
- Small needle nosed pliers
- Wire striper
- Masking tape - to help position, attach and hold components to the PCB
- Solder sucker - especially if you’re learning to solder! but not essential
- Third-hand grips/stand
- A light - anglepoise or small table led - something which will help light your work
- Magnifying glass(es) - especially if you have difficulty with your vision like me. There are also USB microscopes which can be helpful.”
