
“Well, it finally seems that I’ve arrived at the conclusion of my DMG Color journey!
My last attempt to fit a Game Boy Color inside of an original Game Boy (DMG) case was ultimately successful, but it was quite unorthodox. Cutting up the PCB and wiring everything manually was a huge task, and it came with some challenges to overcome as well. Not to mention, screwing the two halves back together without pinching any wires is a huge pain and something I don’t take any joy in doing, which is why it hasn’t been opened again since I finished the build. But, it had all the features I wanted to put into it, and I’ve already put many hours of playtime into it. But, every time I play it, I noticed how much lighter the actual console is – the LiPo inside wasn’t as heavy as the 4x AA batteries. And actually, since I didn’t incorporate load sharing into the battery charger, I found myself waiting for the battery to charge up when I wanted to play it. And, as it always does… the itch returned to make something fun and new. (Who even plays video games anyway?)
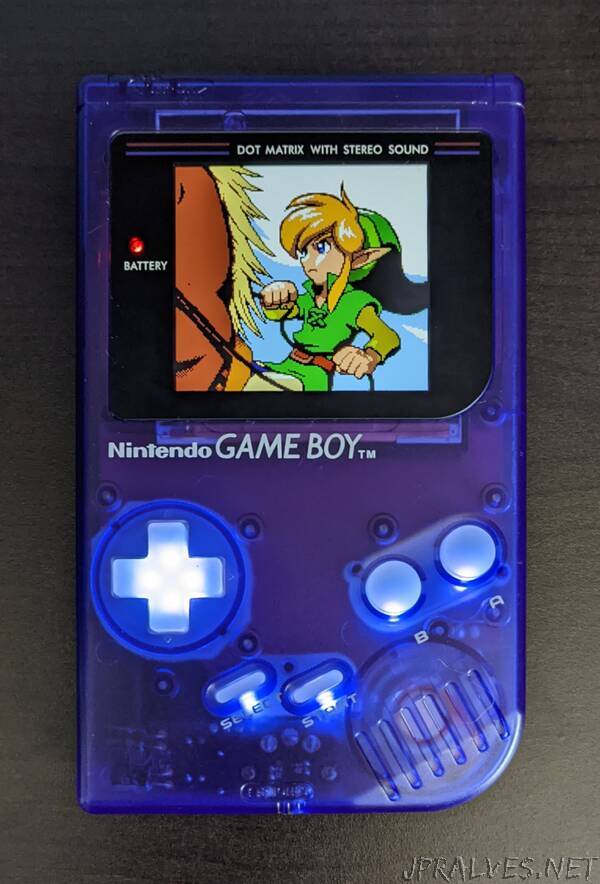
So I set out to make my own custom DMG-shaped PCBs to fit inside a DMG shell, and implement full Game Boy Color support. A true DMGC, redesigned from the ground-up, with a bunch of improvements and new features over my last build. Introducing the new Game Boy DMG Color
As I mentioned, this is an original creation – newly designed PCBs, with only some necessary components harvested from an original Game Boy and Game Boy Color (no hardware emulation – this project uses the original CPU). Here are the project goals:
- An original Game Boy aesthetic, using the original Game Boy shell and interface (link port, volume wheel, power switch, etc.), but with the capability of playing both Game Boy and Game Boy Color games.
- A nice, large IPS screen – the GBC Q5 XL IPS Backlight with OSD kit – with brightness and color palette control via the “navigation switch” housed where the contrast wheel used to be. (I will refer to the PCB attached to the Q5 screen as the “Q5 board”)
- A modernized, efficient switch mode power supply that can run off 4x AA batteries or input from the DC jack, just like the original DMG. Testing shows that playing with NiMH AA batteries can yield more than 18 hours of gameplay at normal settings (AKA, the way I normally play it – maximum brightness and headphones).
- Louder, warmer sound through a modern audio amplifier.
- The option for tactile switches for the face buttons – like the GBA SP.
- The option for backlit buttons, with multiple color modes and brightness control.
- No externally viewable case modifications, outside of trimming the DMG power switch cover for Game Boy Color game compatibility.
The code name for this project is DMGC. This console uses four PCBs, just as the original DMG model did – a CPU board (DMGC-CPU), display board (DMGC-IPS), power board (DMGC-PWR), and headphone board (DMGC-HDP). All circuit board assemblies have their own separate folders in the GitHub repository which contain detailed descriptions of operation, source files for schematics and board layouts (designed using Eagle), exported Gerber files, and some other relevant files.
Bill of Materials
The master BOM with every electronic component required for the four circuit boards is provided here in Excel format. Note that some parts may be out of stock at the links provided in the Excel document, but many can be found at alternate other retailers online, or have a proper substitute. Here is a saved cart from Mouser that contains all the parts in the BOM Excel, including some duplicates. Again, some parts might be out of stock, so double check to see what is missing, and consider ordering multiples of some parts.
The following is the high-level BOM for my specific build pictured above. Note that parts that deviate from the ones listed here (like different shell designs) might necessitate different fitment modifications, or end up being incompatible.
- Original Game Boy Color console
- U1 – CGB CPU (I used version B, I expect any revision except for E, which has a different pinout, will work)
- U2 – LH52256CVTXIZ
- X1 – 8.388 MHz crystal oscillator
- EM10 – A replacement can be purchased here
- Original Game Boy DMG console
- VR1 – Volume dial
- SW1 – Power switch
- P1 – Cartridge connector
- EXT port
- DC jack
- Headphone board components (importantly the headphone jack)
- GBC Q5 XL IPS Backlight with OSD
- FunnyPlaying DMG Q5 IPS Lens (black)
- Custom designed 3D-printed IPS bracket (file located within the DMGC-IPS-01 folder on the GitHub repo)
- Game Boy DMG Shell – Factory A (Midnight Blue)
- Kitsch-Bent clear silicone DMG buttons
Note that the IPS kit I have listed is the easiest IPS kit to use that is compatible with this build. It includes an image centering feature, so you don’t need to fiddle with centering it manually in the shell. Other kits likely would not center nicely in the DMG shell! This kit works electrically, but requires you to center the image yourself. If you end up making some sort of 3D-printed bracket to support this screen, feel free to share it here.”