
“PAM8403 based Custom Audio Board for a Future Pi-Gaming Related Project.
Greetings everyone, and welcome back.
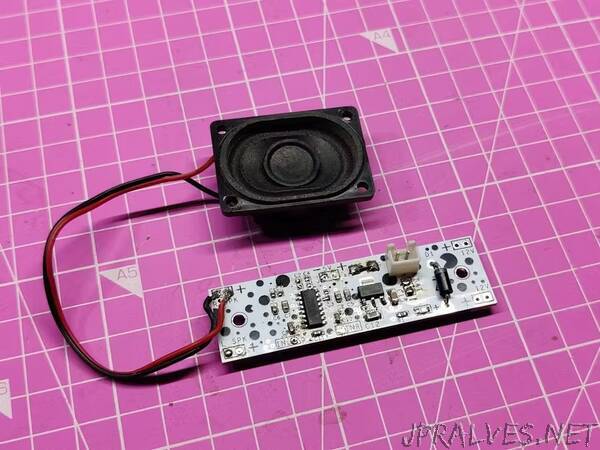
Here’s a small audio-based project I prepared for an upcoming Game Boy project.
The PAM8403 Audio Amplifier IC Setup, in addition to a few additional components, drives a 3 ohm speaker on this audio board.
Since the PAM8403 is a 5V device and will short circuit if given more than 5V, we integrated the AMS1117 linear voltage regulator setup. To charge the battery, we have added a con2 port that is connected through a diode, and we can also connect a DC barrel jack to this setup. The battery supply used in this audio board is a 12V Li-ion battery pack.
This audio board essentially serves as a battery power distribution board, charging the battery and supplying other devices with 12V and 5V power from the battery in addition to a separate audio amplifier board for audio output.
This project is about the whole construction of this project, so let’s get started with the build.
Materials Required
Below are the materials used in this project:
- Custom PCB (Provided by Seeed Studio Fusion)
- PAM8403 Audio Amplifier IC
- AMS1117 Voltage Regulator 5V
- 1uF 0603 Capacitors
- 0.47uF, 0603 Capacitors
- 10uF 1206 Capacitor
- 1uF 1206 Capacitor
- 220pF 0603 Capacitors
- SR206 Diode
- M7 Diode SMA Package
- CON2 JST Connector
- Rocker Switch
- 3 Ohms Speaker
- 3.5mm Audio Jack Cable
- XIAO SAMD21”