
“This circuit gives accurate reading to all types of an inductor, we can measure unknown inductor value using this. Arduino inductor meter.
This is the 1st part of our LCR tutorial in which we are going to make an inductance meter. In the upcoming parts of this series, we will upload information and circuit diagrams of the capacitor and resistance meter.
Inductance meter:
An inductance meter is used to measure the unknown inductor value. For more precision and accurate readings, we will use a microcontroller (Arduino) as the brain of the circuit.
Inductor meter idea:
We usually need an inductor to make tank circuits while working with radio frequency, power circuits, and amplifiers. But we cannot measure the value of the inductor in our simple multimeter. So, either we can buy one or DIY (make). LCR meters are too expensive, that’s why we are making this inductor meter.
Components required:
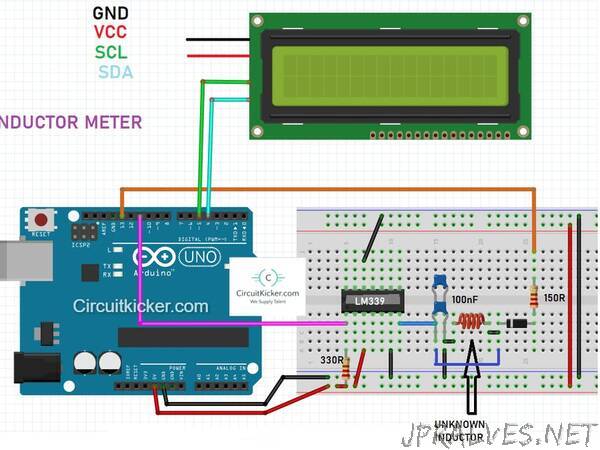
1) Arduino Uno
2) LM339 OP-AMP
3) 1N4007 diode
4) 150 ohm, 330ohm resistor
5) 16X2 LCD with I2C to reduce connections
6) 5V battery
7) 2x 100nF capacitors (non-polar)
8) Some jumper wires (if working with breadboard)”