
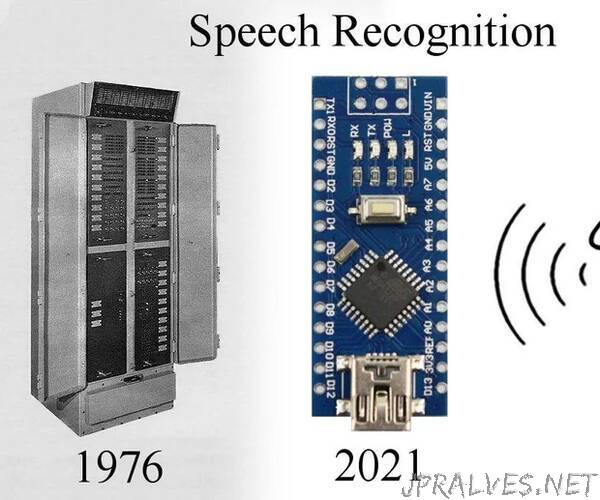
“I was desperate for something to read during lockdown and found in my bookcase an IEEE report on Speech Recognition from the late 1970s. Could an Arduino Nano do the same as a computer from that era?
How does a Nano compare with back then? A Nano has 2KB RAM, 32KB program ROM and runs at about 10 MIPS (depending on the instruction mix). The sort of minicomputer people were using back then ran at 0.5 to 8 MIPS and had, say, 2K to 32K of memory split between program and data. Most groups had a PDP-8 or PDP-11. One group had a huge IBM-360 with 128kB and 15MIPS. Another group had re-purposed a Univac missile fire control system running at 1MIPS.
So a Nano is in the right ballpark for simple speech recognition but why bother? Other speech recognition projects exist but either require a web connection and that you send all your private conversations to Amazon or Google; or they require a larger computer like a Raspberry Pi. Clearly, a Nano isn’t going to be as good as those. Can it do anything useful at all?
The hard problem of speech recognition is continuous speech by any person using a huge vocabulary. At the other end of the scale is a single speaker saying single words from a small vocabulary. That’s what I’m going to attempt.
What use is that? Perhaps you want a head-mounted multimeter or a tiny ear-mounted mobile phone with no screen or keyboard. Any sort of hands-free display could benefit from simple voice commands. Or what about a remote-control robot? An MP3 player while jogging? There are lots of places where a dozen command words could be useful. If you search Instructables for “Alexa” or “Siri”, you’ll find around 200 projects - many of them could benefit from not requiring an internet connection. Then you could add speech output using, for instance, the Talkie library.
Did it work? Well, more or less. Under ideal conditions I was getting 90% to 95% correct recognition which is roughly what people were getting in the 1970s. Maybe you can improve my code and do better. This an “experimental” project. It’s something for you to work on and improve. It’s not something that you can just build and it will work first time.
For this project, you will need an Arduino Nano (or Uno or Mini or similar so long as it uses a 16MHz ATmega328), a microphone and an amplifier for the microphone. I chose the MAX9814 microphone amplifier as it has automatic gain control.
You’ll need an Arduino Nano. I’m assume you already know how to program an Arduino - if not there are lots of Instructables tutorials.
Search eBay for a “MAX9814” module - mine cost £1.55 plus postage. A MAX9814 includes a microphone amplifier and an AGC (Automatic Gain Control). If you can’t wait for delivery and want to make your own, see the next Step.
The MAX9814 module has 4 pins labelled
GND 0V
VDD 5V
GAIN
OUT to analogue pin of Nano
AR
The A/R pin controls the “Attack and Release Ratio” of the automatic gain control:
A/R = GND: Attack/Release Ratio is 1:500
A/R = VDD: Attack/Release Ratio is 1:2000
A/R = Unconnected: Attack/Release Ratio is 1:4000
The actual timing of the attack and release is set by a capacitor on the module.
attack time = 2.4 * C
(time in mS, C in uF)
The Gain pin controls the gain of the AGC:
GAIN = GND, gain set to 50dB.
GAIN = VDD, gain set to 40dB.
GAIN = Unconnected, uncompressed gain set to 60dB.
In the circuit shown above, I have left A/R unconnected. The Gain is connected to VDD which is the lowest gain. You could connect them to digital pins of the Arduino so you can control them in software: for “unconnected”, set the pin to input.
I attached the microphone and MAX9814 module onto a “microphone boom” to the side of my mouth and had a shielded cable to the Arduino on my desk. The microphone should be to one side of your mouth to avoid “popping” with plosives (p, t k) or other breath noises.
I found a gain of 40dB gave the best signal-to-noise ratio with the microphone on a boom near my mouth. With higher gains, background noise is amplified too much; when there was speech, the AGC reduced the speech signal to reasonable level but when you stopped speaking, the noise slowly returned.
The sound signal from the module is centred around 1.25V and the signal goes from 0V to 2.5V. The Arduino ADC has 10 bits so the numeric value goes from 0 to 1023. I used the 3.3V output of the Nano as the analogue reference voltage so 0 to 1023 means 0V to 3.3V.
You could connect the module directly to one of the ADC input pins but in the diagram above I have included a simple RC high-pass filter. It means that the lower frequencies of speech (below 1.4kHz) are de-emphasised. The spectrum is more flat and we can use integer arithmetic more effectively. By removing low frequencies, the amplifier and ADC are less likely to clip. There are many discussions of pre-emphasis in speech recognition, for instance this one. Because the module is AC-coupled, two resistors are used to centre the ADC input around 1.65V.”