
“In this Instructable I will show you my first electronic and IT project that I have made during my studies at the Moroccan School of Engineering Sciences (EMSI). As an IT engineer I learned on my own how to use the electronic components and how to program Arduino with C language to control them all in a wooden house model that I designed and then cut with a laser cutter.
The main idea of this project is to make something that work and also look similar to a domotic house in the form of a wooden model
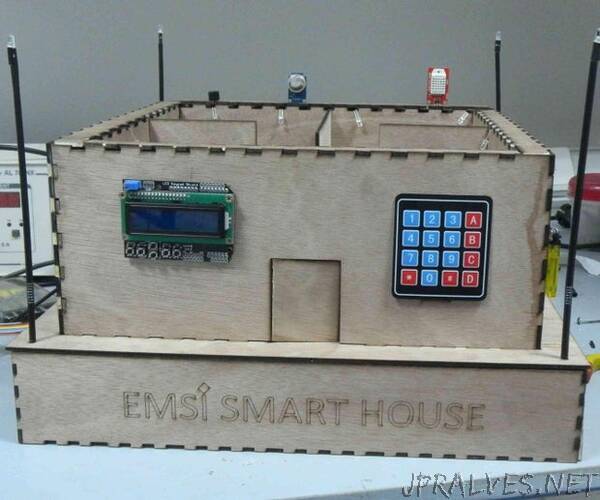
This model has the following functions :
- The entrance door can be opened with a code entered on the matrix keyboard. Once opened, the door closes automatically after five seconds.
- The lights in one area of the house (living room/kitchen/bedroom/toilet+bathroom) can be turned on or off using the push buttons.
- The automatic lighting of the house is done when it is dark, and when it is daytime the lights are automatically turned off.
- An LCD display provides a variety of displays including: date, time, temperature and informative messages.
- The alarm can be activated as well as deactivated using the matrix keyboard.
- The alarm is triggered automatically when there is an infiltration of a thief.
- The alarm is automatically triggered when there is a gas leak and then stops when the gas is no longer present. When the alarm goes off, the lights in the house automatically turn off and the curtain opens by itself to ventilate the area.
Electronic Components:
1- Arduino Due: this is the heart of our project, we transfer inside it a program written in C language so it will capable of controling all the other electronic components.
2- Mini breadboard: Necessary to solve the problem of insufficient pins and space in the model and to avoid the purchase of another Arduino board.
3- Wires M/M F/F : Allow to conduct electricity to the desired location.
4- LEDs: Which will play the role of lighting inside and outside the house.
5- Matrix keypad: To enter the code, to open the door, activate and deactivate the alarm.
6- LCD KeyPad Shield: To display date, time, temperature and other informative messages. Also each push button plays a main role
7- PIR sensor : To detect the presence of movement when the alarm system is active.
8- ldr light sensor: it detects the degree of brightness outside the house. It is thanks to this component that the outdoor leds will turn on when it is dark and turn off when it is light.
9- Temperature sensor: Senses the temperature degree that will be displayed automatically on the LCD display.
10- Gas sensor: Measures the amount of gas in the house.
11- Resistance: Are all 220 ohm connected with the 16 leds so that they won’t get burned.
12- Buzzer: To play the role of alarm. This component will automatically be activated when the motion sensor detects a movement or when the gas detector smells gas with a high quantity.
13- 180° Servomotor: One will open and close the door and the other will open and close the curtain.
14- Real Time Clock DS3231: this is the component that give us the exact date and time of today.
15- Battery support: one will power the arduino board and the other two will power the other electronic components.
16- ARM 1117 : Specially used to help the small 180° servomotor to be powered with 3.3 V.
17- interruptor: Ideal for controlling the flow of electric current to all electronic components.”