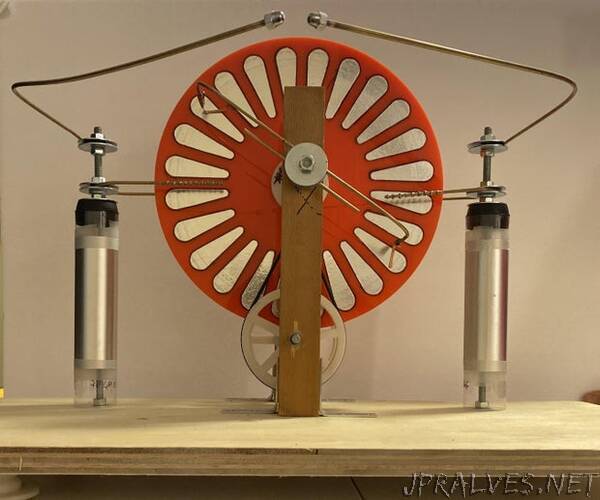
“*Figure numbers for pictures are shown once you open up the picture in the top left cornerThe Wimshurst Machine belongs to a class of electrostatic generators called influence machines, which separated electric charges through electrostatic induction or influence. Electrostatic machines create high-voltage charges without the familiar coils of copper wire, permanent magnets, and commutators found in conventional generators. Theyre made of brass, glass, and wood, and they look more mechanical than electrical.
The coolest thing about these generators is that you can feel them working. As you crank a Wimshurst Machine, you can hear it crackle with energy, you can smell the sharp tang of ozone, and you can feel the hair on your arms stand up as the Leyden jars begin to charge.
James Wimshurst invented the Wimshurst Machine in the late 1800s. It is a simple high voltage generator and can be used in experiments. It superseded other devices such as the “Holtz” and “Voss” machines. It was one of the first ways to generate high voltage to more or less conveniently take Rntgen pictures around the turn of the century. The Wimshurst machine was superseded around 1924 by more practical generators such as the Marx generator, which is still used today in laser printers and CRT television (Although those are becoming obsolete too). [1]
The Wimshurst Machine consists of its two iconic counter-rotating disks and two Leyden jars (capacitors). Most often, it is powered by a hand crank, but it can also be powered by an electric motor.
This instructable will show how I designed and built a full-sized Wimshurst Influence Machine from scratch.
My particular Wimshurst Machine generates 30,000 Volts (calculated using the maximum distance between spark gap) and produces several tens of microamperes, which is a rough estimate (with the Leyden Jars engaged).
Supplies:
Estimated Cost: $150
Disk Assembly
(2) 12” x 12” x 1/8” Acrylic sheet
(1) roll of Aluminum Foil Tape
(1) 5/16” x 3’ Acetal Homopolymer unthreaded rod blank (www.grainger.com)
Drive Assembly(3) #258 Buna-N O-ring, 1 extra for backup (www.oringsandmore.com)
(3ft) 5/16”-18 Threaded Steel Rod
(4) 5/16” Set Screw Collar
(50) 5/16” Nut
(25) 5/16” Lock washer
(25) 5/16” Flat washer
(15) 5/16” Nylon lock nut
(12) 5/16” Fender washer
(1) M5 Screw and washer
(20 pack) 608-2RS Bearing
Chassis(1) 2’ x 1’ x 3/4” Plywood board
(2) 1.5” x 1.5” x 11.5” Wood board
(12) #6 x 3/4” Flat head Phillips wood screw
Electrical Assembly(10 piece) 1/8 x 18” Bronze Brazing Rods (Ace Hardware)
(1) 4 ft. 1.5” Fluorescent lamp protector sleeve for the Leyden Jars
(6) #6-32 Cap Nut
(4) Alligator clip, 1.25”
3D Printed Parts:
Various 3D Printed Parts Attached
Print using: a perimeter of 4, infill of 15%, layer height of 0.2mm. This will make the prints the strongest.
Alternatively, print using FormLabs Form 2 SLA 3D printer, which uses a different technology than standard FDM 3D printers. The resulting parts have a higher quality and are much stronger.
Tools:
Multimeter
Soldering iron and solder
Drill and drill bits
Wire strippers, wire cutters, and pliers, electrical tape, etc.
Measuring tape, ruler, etc.
Saw”
