
“Braille as a form of communication has always interested me greatly- so when I saw a contest about making Tools, I took it as an opportunity to develop an idea that I had been thinking about for the past year or so.
When researching how Braille worked and the tools that were used to generate said writing, I was surprised to see how expensive they were. It was as if there were two price ranges:
Very expensive and very precise (we are talking upwards of $2000)
Very cheap and not very precise
For Braille to be read quickly and easily, there are a series of dimensions one must follow (such as the distance between bumps, from the edge of the paper etc.). As such, I thought that a tool that would be very useful would be one that was cheap and even Open Source, whilst also capable of stimulating the interaction between the blind and those who aren’t.
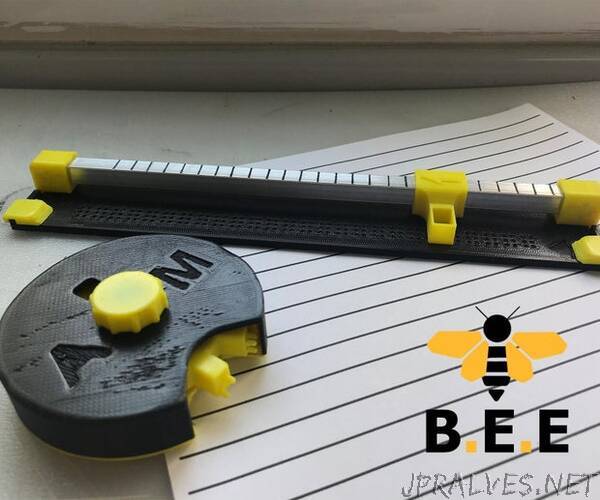
With that in mind, our team developed B.E.E (which stands for Braille Embossing Experience).
Our goal was to create a tool for embossing which could be made at home, would cost less than $5 to make, and could be carried inside a backpack without disrupting any usual movements.
This Instructable will detail not only the way to construct your own B.E.E unit, but also all the design process and work that it took to arrive to where to product is today.
Supplies:
To build your B.E.E unit you will need:
1 x Square Aluminum Tube (0.8 cm x 0.8 cm x 1000 cm)* $1.59
PLA Filament (I use two colours but that doesn’t affect how it works at all)
Superglue
Two part Epoxy
Ok let’s get to building!
* The length doesn’t really matter as you will only be using about 200 cm of the tube, these are the exact dimensions of the tube I bought”