
“IoT - Eggs incubtor over the internet, with data collection using CavyIoT service
Eggs Incubation is an interesting topic among the Arduino enthusiastic. Basically, it is similar to the type of incubator which can be used as a substitute of poultry chicken to incubate the chicken eggs automatically. It will be helpful for the farmers to incubate the eggs automatically without the need of human intervention, by keeping the physical quantities such as temperature and humidity at required level, so that the fetuses inside them will grow and incubates without the presence of mother.
Furthermore, egg incubator will not only improve the poultry production considerably but will also help in the regularity of income making, enabling the farmers to be able to get transition into possible rural entrepreneurship.
This project uses a CavyIoT-DevBoard (firmware) and CavyIoT platform as a service..
With the help of Control Panel from anywhere we can
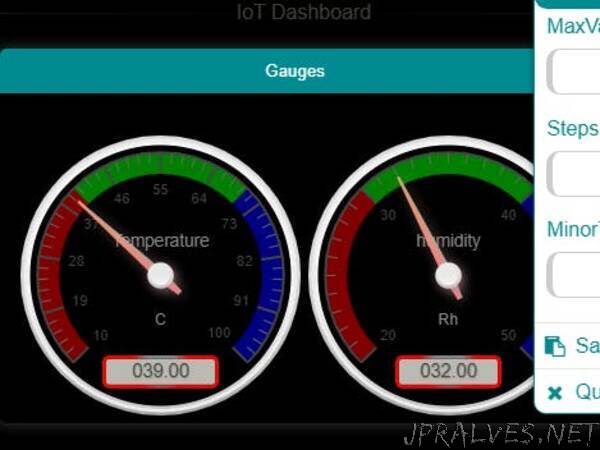
Monitor live sensor data in Charts, Gauges.
Control all operations of incubator.
Set triggers to automate the incubator processing from remote location.
Record all operations of incubator for further analysis.
Convert a log file to PDF and JSON format.
Can select the AUTO and MANUAL mode of operation.
Prerequisite:
Registered account at CavyIoT developers site.
ESP8266 board installed in your Arduino IDE.
If not registered then register your account at https://www.developers.cavyiot.com with your valid email id, it is free.After successful registration, within five minute you will get email verification code at registered email address.Login with your registered username and password. and verify your email. Once the verification is done, you will get free Demo device with validity of one month.(You can see Demo device in your client area )
If ESP8266 board is not installed in your Arduino IDE follow this step.The ESP8266 community created an add-on for the Arduino IDE that allows you to program the ESP8266 using the Arduino IDE and its programming language.Start Arduino and open Preferences window.Enter https://arduino.esp8266.com/stable/package_esp8266com_index.json into Additional Board Manager URLs field. You can add multiple URLs, separating them with commas.Open Boards Manager from Tools > Board menu and find esp8266 platform. Select the version from a drop-down box. Click install button. Don’t forget to select your NodeMCU 1.0 (ESP-12E Module) board from Tools > Board menu after installation.”