
“Why bother counting filament? A few reasons:
Successful prints require a properly-calibrated extruder: when the gcode tells the extruder to move the filament 2mm, it needs to move exactly 2mm. Bad things happen if it over-extrudes or under-extrudes. A well-calibrated counter can keep an extruder honest.
Slicers approximate how much total filament a given print will take (in both length and weight) and I’d like to check those values.
Measuring the movement of filament also let’s me know when printing has started and when it has stopped.
I needed something to cover the space left by the removal of the ugly giant logo on the front of my printer.
It’s cool.
I was inspired by this instructable, which repurposed an old PS/2 mouse as a filament counter for a 3D Printer. Not only did it add a useful feature to a 3D printer, it repurposed an old device that would’ve otherwise ended up in a landfill. But that project was built around the mouse’s PS/2 interface, which seemed needlessly cumbersome. So I took this as an opportunity to learn about the only essential component: the rotary encoder.
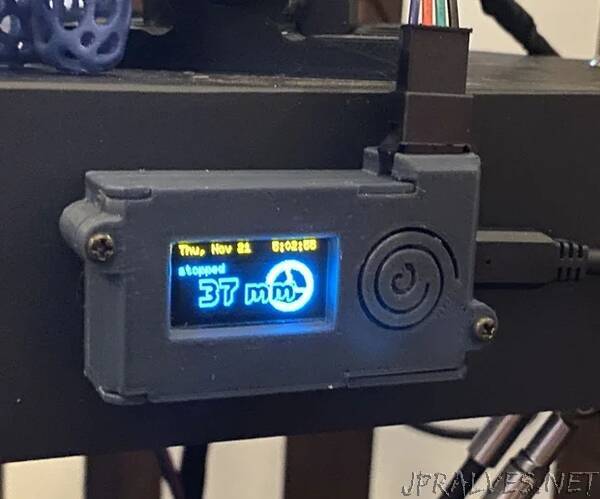
Supplies:
Rotary encoder
ESP32 based dev board
I2C OLED display (two-color unit looks especially cool)
Tiny momentary pushbutton
De-greased 608ZZ bearing
Two #39 o-rings from the hardware store
Two 2.5mm self-tapping screws
Bunch of wires
3D Printer and some filament”