
“Most of my DIY projects make use of a 3D printer. The big advantage is that you can design and make your own 3D objects. In a previous instructable I’ve assembled and improved an Anet A8 3D printer. And after a few improvements, this printer gives a nice result.
In addition to a 3D printer, it can be useful to use a CNC machine or a laser cutter. I’ve already attached a dremel to the Anet A8 3D printer. And this is also documented in a previous Instructable.
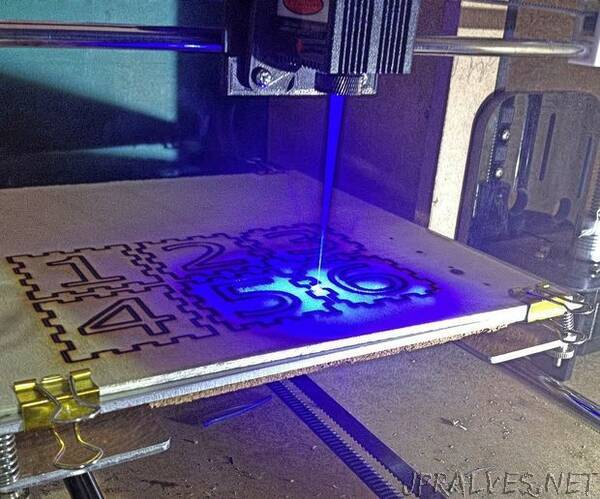
This is the third Instructable with the Anet A8 3D printer. And this time I’ve altered the 3D printer into a laser cutter. This project starts with a working 3D printer. And it is not necessary to read the previous parts.
The laser used is a 5 Watt diode laser. This makes it possible to cut or engrave cardboard, fabric and wood. The used materials may not be too hard (metal), too transparent (plastic) or too thick (> 3 to 5 mm).
I opted for a separate 12 Volt laser. Without the controller and power supply. The 3D printer already contains a 12 Volt power supply and the laser is controlled by the mainboard of the printer. The omission of these parts made it possible to choose the slightly more expensive 5500mW laser, instead of the 2500mW laser.
Converting the 3D printer to a laser cutter is relatively easy. It can be done by anyone who has assembled a 3D printer. First, the nozzle is replaced by a laser, using a self-made 3D printed holder. Then the laser is connected to the power supply and the mainboard. The laser circuit is optically sepparated from the 3D printer circuit. This makes the modification mainboard independend, so the laser can be mounted on almost any 3D printer.
Supplies:
Anet A8 3D printer (or other: 12 Volt, dual fan)
Alfawise 5500 mw laser (or other:TTL required)
EL-817 optocoupler
330 and 470 Ohm resistor”