
“Health-Guard: Empowering Patients & Healthcare Providers with Freedom & Real-time Vital Monitoring.
Introduction
In this tutorial, I will guide you through the process of building a “Health Guard” system for remote health monitoring. This project is designed to address the limitations of traditional health monitoring systems by allowing patients to move freely while continuously monitoring their vital signs. I have integrated sensors, Arduino Nano, Raspberry Pi, and MQTT communication to provide real-time data to healthcare professionals and issue emergency alerts when vital signs cross predefined thresholds.
Purpose
The purpose of the “Health Guard” project is to create an effective and user-friendly solution for remote health monitoring. By following this guide, you will learn how to:
- Build a wearable health monitoring device.
- Set up a User-Friendly Interface using a Raspberry Pi for displaying patient vital signs.
- Establish reliable communication between devices using MQTT and the Backend server made using node.js and express.js.
- Implement an emergency alerting system.
- Ensure data security and privacy.
Equipment and Hardware Requirements
Before you get started, you will need the following equipment:
- Arduino Nano
- Raspberry Pi
- LM35 Temperature Sensor
- HW827 Pulse Beat Sensor
- Adjustable bands for securing sensors
- Power source for the wearable device
- Monitor for Raspberry Pi (in my case I’m using thelaptop)
- Internet connectivity for MQTT communication
- Laptop for monitoring patient vitals on hospital reception
- Smartphone for receiving alerts
Software Requirements
You will also need the following software:
- Arduino IDE
- Python for Raspberry Pi
- MQTT broker (in my case I’m using Hivemq)
- Node.js, express.js, and MongoDB for the backend for communication b/w all the devices and sending data to the reception interface.
- React for the web-based reception interface
Step-by-Step Tutorial
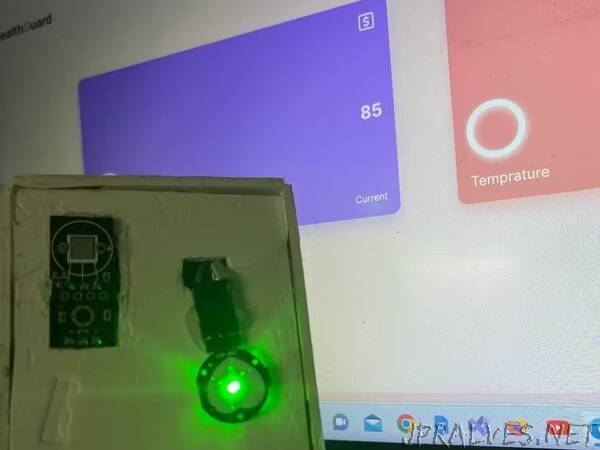
Step1. Building the Wearable Device
- Connect the LM35 temperature sensor and HW827 Pulse Beat Sensor to the Arduino Nano.
- Write and upload the Arduino Nano code for data acquisition.
- Make a box in which sensors and the whole system are assembled, add the adjustable bands, Power on the wearable device, and ensure sensors are in direct contact with the patient’s skin.
- Test the system and calibrate the sensors accordingly.
Step2. Setting up the Raspberry Pi
- Install the necessary libraries and dependencies on the Raspberry Pi.
- Write and run the Python code for displaying patient vital signs in real-time.
- Ensure the Raspberry Pi is connected to a monitor.
Step3. Establishing MQTT Communication
- Install an MQTT broker library (paho-mqtt)on the Raspberry Pi.
- Configure MQTT communication between the Arduino Nano and Raspberry Pi.
4. Creating the Graphical User Interface
- Develop a user-friendly GUI using Python for the Raspberry Pi.
- Display real-time patient vital signs on the GUI.
Step5. Implementing the Emergency Alerting System
- Set predefined thresholds for vital signs.
- Configure the system to issue alerts to a nurse’s smartphone and on the reception interface when thresholds are crossed.
Step 6. Building the Backend Communication
Node.js and Express.js Setup
- Install Node.js and Express.js on the Raspberry Pi.
- Create a new Node.js project for the backend of the “Health Guard” system.
- Set up routes and controllers for handling data from the Arduino Nano and managing alerts.
- Implement an API endpoint for receiving data from the Arduino Nano and storing it in a MongoDB database.
MongoDB Integration
- Install and configure MongoDB on the Raspberry Pi.
- Set up a MongoDB database to store patient vital sign data.
- Establish a connection between the Node.js backend and MongoDB.
Step 7. Developing the Reception Interface
Setting Up React
- Install React on your development machine.
- Create a new React project for the web-based reception interface.
Building the Web Interface
- Develop a user-friendly web interface that healthcare professionals can access to remotely monitor patient vitals.
- Utilize the API endpoints provided by the Node.js backend to fetch real-time data.
- Display patient vitals in a clear and organized format, with visuals for alert notifications.
Testing and Integration
- Test the communication between the backend, MongoDB, and the reception interface to ensure data retrieval and real-time updates(in my case for API testing I have used the postman).
Step 8. Setting up the Mqtt Application For the SmartPhone:
- Here, I’m using the already-built application for subscribing to the MQTT topic to receive emergency alerts on the nurse’s smartphone.You can also build your own user-friendly application.
Testing in all the steps is very Crucial to succcesfully build this system.
Conclusion
In conclusion, the “Health Guard” project offers an innovative solution for remote health monitoring that prioritizes patient mobility and the timely delivery of care. By following this tutorial, you can build your own system for remote health monitoring and contribute to the advancement of healthcare technology.
Future Enhancements
To further improve this project, you can consider:
- Enhancing data security and privacy to comply with healthcare data protection laws.
- Exploring machine learning and AI algorithms for early detection of anomalies in patient vitals.
- By addressing these aspects and focusing on user needs, this project has the potential to make a significant impact on healthcare in the future.”