
“Create a working DSKY using a 3D printer and my AGC simulator running on a Raspberry Pi and slave Arduino Nanos.
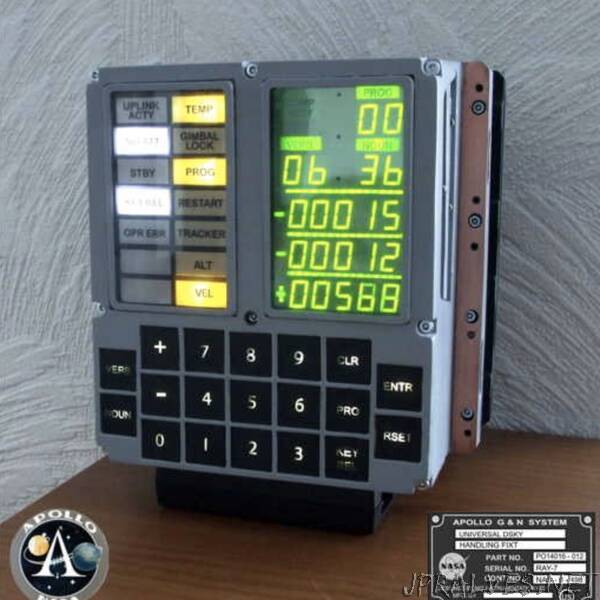
This project is designed to build a working model of the Display Keyboard (DSKY) portion of the Apollo Guidance Computer. The model utilizes 3D printed parts and 2 LCD screens along with a Raspberry Pi and 3 Arduinos. The DSKY will be capable of running the actual AGC assembly code internally using simulator code or connect to a hardware version of the AGC I am building as another project.
Objectives:
1) Build a realistic a DSKY using 3D printing.
2) Have the DSKY operate running the original assembly code.
2a) Standalone operation using an internal simulator.
2b) Connect to an AGC to drive the DSKY.
Background:
I have been working for two years on another project to build an Apollo Guidance Computer. I built a hardware level simulator that runs the actual assembly code provided by Ronald Burkey. https://www.ibiblio.org/apollo/ Ron created an assembler and has most versions of the source code on his web site. I modified his assembler to output Motorola S-Record files that can be burned into EPROMs. Ron also provides a simulator, but his simulator does not drive down to the hardware level. I built a hardware simulator that utilizes the Control Pulse Matrix to control the simulation. From this effort I developed a set of schematics that utilize 7400LS TTL chips. I am in the process of wiring chips together, a long, slow and tedious process.
Part of the AGC is the DSKY. I have a working DSKY using TTL chips driving 7-segment LCDs and 19 generic keys. I learned a lot about the use of TTL chips, but I am unsatisfied with the look of the DSKY. After building a paper model of the DSKY I decided to put my modeling skills to work to 3D print a realistic model of the DSKY. Fortunately there are a number of people on this site that have 3D printed a DSKY using the actual NASA documents as reference.
Build Decisions:
The first decision was do I use the guts of the AGC DSKY to drive a simulation or utilize more modern technology? If I use what I already have developed for the AGC project then this model will only work with the AGC attached. If I use modern microprocessors to drive a pair of LCD screens then I get a better looking model and I have the ability to run the simulator software internally, thus providing a working standalone model as well as a DSKY for my AGC project. I will go down the modern processor path.
The second decision is do I drive everything with a Raspberry Pi, Arduino or combination thereof? My Earth Rover project utilized a Raspberry Pi as the “big brain”, providing a web site to drive the rover and an Arduino as the “small brain” to interface with all the sensors and motors. This is the perfect solution for this project. I got a 3 for 2 deal on Arduino Nano Everys and decided to use a Nano to drive each of the displays and the third to drive the keyboard. The Raspberry Pi can set up a WiFi hotspot so can remotely log in and control the simulation.
Technology:
To accomplish this project I needed to learn a CAD program and how to 3D print. The CAD program I chose was AutoDesk’s Fusion 360 as this is free if you are a hobbyist and not a for profit company. The learning curve for what I needed to do was relatively easy. I purchased a 3D printer from FlashFusion, the Guider 2S. The printer needs to be large enough to print a part that is 8” x 8.25” x 3”. After a few screwups on some smaller parts, I got the hang of it quickly. Note that some of the larger parts take over 34 hours to print.
As a software engineer, my favorite language is Java, therefore the Raspberry Pi software is mostly Java. Ardiunos have their own language which is C based and easy to use. Most every device you purchase for this sort of hobby has Arduino libraries, making coding very straight forward. I created my own simple protocol between the Raspberry Pi and the Arduinos. For Java development I would suggest a free IDE such as Eclipse or IntelliJ Idea. “