“There are many POV projects, but all of them need special mechanical parts, special tools and good skills. This is a way to go without it.
At the time of writing, when I did a search for “POV” on Hackster, it gave me 63 hits. But most of them require very special parts and tools and a lot of time to build. Some other come with only five LEDs. O.k., in principle it will work, but it looks very poor. Long time ago, there was an Arduino shield called Blinkenlight, equipped with 20 LEDs, but it is not for sale any more. As a replacement, I found this one:
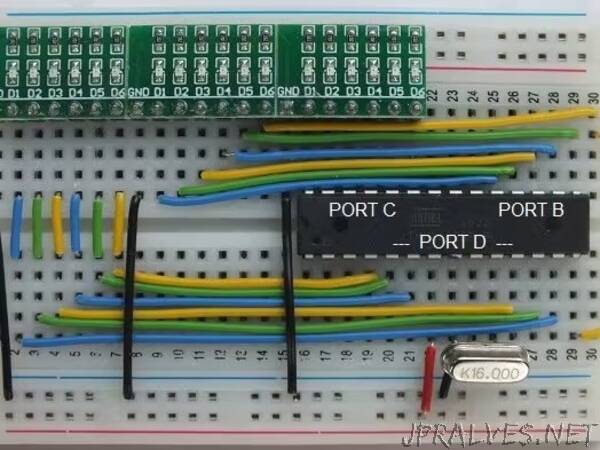
You can mount three of them on a standard breadboard next to each other and connect them with eighteen pins of an ATmega328 in DIP-28 package. (If you get an Arduino UNO in DIP version it is easy to program the chip and then remove it from the board.) Actually, you can arrange the parts in order to connect pins A0 to A5 directly with one of the modules saving you 6 wires. I must admit there will be two gaps between the modules because of the GND pins, but this is the price for using what is available on the market.
As you know, the pins of the ATmega328 are grouped in three ports, so for performance and easiness of programming, connect the LEDs of each module to the pins of the same port. As shown in the cover image, connect port C to the right-most LEDs, port B to the middle ones, and port D to the left ones. As you will know, it is best to never touch the pins 0 and 1 on Arduinos.
Having done this, you only need some data to present and a short program sending the data to the LEDs as fast as possible to induce the POV effect.”
