
“Remotely controlled car - IoT based project using Wi-Fi Module and MIT App Inventor with intuitive control. A step-by-step guide!
This is a fairly simple IoT project with a lot of learning opportunities.
I’ll begin with a detailed overview of the steps one should go through before directly diving into creating the final product. While there was already a lot of material on DIY robot cars available on the internet, a lot of painstaking days went by without any significant progress while working on this particular project, especially since I’m a fair beginner in the subject of IoT. So, I bring to you a step-by-step guide for how I successfully got through with this project and all the issues I ran into (and obviously how to overcome them).
First make sure to acquire all the hardware components listed above!
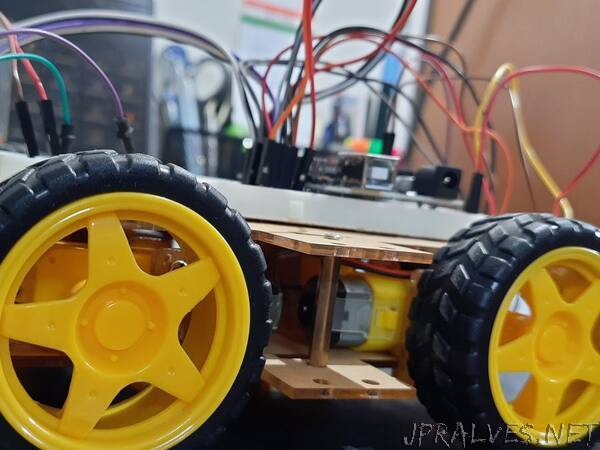
1. Arduino Uno and the motor drivers
I chose to work with L298N motor driver modules (because that is what the internet recommended). A detailed overview of how the motor drivers work and how to interface them with your Arduino board has been provided here. This webpage really helped me a lot in getting started with making my RC car.
I used 2 motor drivers to control my 4 motors. Due to a lack of GPIO pins on my Arduino board, I couldn’t possibly write a program to control all 4 of the motors separately. Therefore, the only solution to my problem was to connect my two motor drivers in parallel. I appointed one motor driver for the rear and another for the front in my 4WD. So, my arrangement was such that when given a particular input, both the left motors (of both motor drivers) would undergo the same change (in speed and direction). As with the right motors in both front and rear.
Issues:
Motors working with direct supply but not after connecting to motor driver. This could be because of low voltage supply or the motors are drawing more current than being supplied. First of all, make sure that your voltage supply is greater than 7V. Anything less than 6.5V may cause the motor driver to start fluctuating (flickering LED is a symptom of this) and the motors will not turn. Secondly, you need a battery which can supply current as required. Personally, I used 11.1V 3S 2200mAh 25/30C Li-Po Rechargeable Battery with XT60 connector. This was pretty expensive and I’d only recommend this to you if you plan on using the same for other projects (it is awesome for drone applications!) as I had to purchase more necessary accessories for it like the Male XT60 to Female JST adapter (to use the battery with jumper wires) and a Li-Po charger obviously. The main goal is to achieve a sufficiently large current supply, so you can look for a battery to satisfy your requirements.
Both motors not rotating with the same speed. This again happens due to lack of required current supply. Your battery may be giving a voltage output of 12V, but one of the connected motors still might run at half the speed of the other, which will cause uneven movement after the final assembly is done. At least a 5A current supply would be enough for all 4 motors to run smoothly.”