
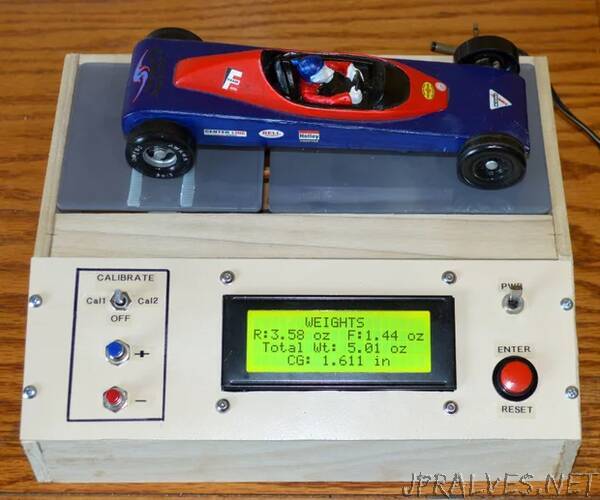
“A key factor when building a pinewood derby car is its weight. The Boy Scouts of America and other organizations specify a weight of no more than 5 ounces. To improve performance many builders will add as much weight (mass) as possible up to that maximum allowable weight limit. What is often overlooked is the car’s center of gravity (CG) (AKA Center-of-Mass). Too far back and the car’s front wheels risk the possibility of jumping the track. Too far forward and you lose out on a few extra inches of acceleration during the downhill part of the track. Many pinewood car building experts agree that the ideal CG location is about ¾” just forward of the rear axle (assumes a standard pinewood derby car wheel base of 4 3/8”). There already are many gadgets on the market that help you determine your car’s CG. But since we need a scale to weigh the car anyway I thought that if the scale can also determine the car’s CG at the same time it would make the task of adding weights to the car a bit easier. I realized that if I can simultaneously and separately measure the weight at both the front and rear axles, I can easily calculate the CG. Having played around with the HX711 load cell sensors in the past I knew this would be a great Arduino based project.
This project uses two inexpensive HX711 load cell sensors to measure the front and rear axle weight, a 4 row, 20-character Liquid Crystal Display (LCD) to display the weights and CG, some switches and an Arduino UNO microcontroller to do all the computing.
The electrical parts required for this project are listed below.
Qty=1 - Arduino UNO Microcontroller Board
Qty=2 - 1 KG Scale Load cell Sensor, w/ HX711 ADC Module
Qty=1 - Miniature toggle switch, SPDT with center off position
Qty=1 - Miniature toggle switch, SPST
Qty=1 - 5.5mm Power Receptacle, Panel Mount
Qty=1 - Power Supply Adapter, 9VDC, 400ma (minimum) with 5.5mm Power Plug
Qty=3 - Miniature pushbutton switch, SPST N.O.
Qty=1 - 20 X 4 LCD Display w/ I2C Backpack, 5 Volt
Qty=1 - Prototyping circuit board for mounting the HX711 ADC modules (Optional)
The wooden enclosure (case) shown in this project is built from the following materials:
¼” x 2.5” x 48” Hardwood Poplar or Ash Board for the sides, Home Depot #:719931245984
Qty=2 - Pine wood blocks 0.75” x 1.0” x 3.625” in which to mount the load cells
Qty=4 - ¼” Spacers/standoffs for mounting load cells to pine wood blocks
Acrylic or Plexiglas or Polycarbonate sheet or tempered hardboard for the weighing platforms
Qty=4 - Spacers, TBD length for mounting weighing platforms to load cells
Qty=4 - M4-0.7 X 20 mm Flat Head Phillips Screws for mounting weighing platforms to load cells, Home Depot #: 887480117585
Qty=4 - #4 x 3/8” Pan Head Phillips Screws for mounting front panel
Assorted Wood screws for attaching load cells to support blocks and the base to the enclosure
Tools & Materials
Computer – Used for programming the Arduino UNO microcontroller
Software: Arduino Integrated Development Environment (IDE) - Free download from https://www.arduino.cc
Fine Tip Soldering Iron
Rosin Core 60/40 solder
Standard hand tools, wire cutter, wire strippers, needle nose pliers
Wood working tools
Wood glue
Calibration weight whose exact weight is known (Suggest between 1 & 5 ounces).”