
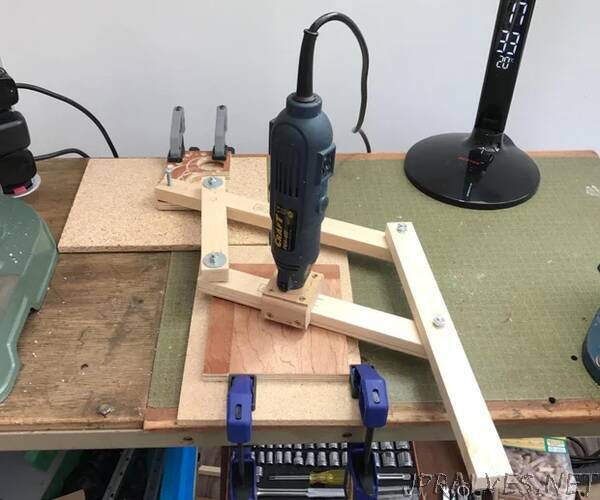
“A pantograph is a simple series of levers of a set length that can be used to enlarge or reduce and existing shape. Very often used for drawing, this version is a small & cheap DIY version of the typically larger and more expensive engraving pantographs that can be bought.
The engraving pantograph differs in design from a drawing pantograph (often used with pencils) in that for a drawing pantograph, either the tracing point or the pencil (depending on if you are enlarging or reducing) will coincide with one of the pivot locations. As we are using this for engraving with a Rotary Tool for engraving, this would make it much more complex, so to avoid this, I have moved the position of the Rotary Tool away from the pivot allowing us to use a very simple pivot. This changes the geometry of the levers slightly but makes the pivot design and mounting the Rotary Tool much simpler whilst still getting the same result.
A pantograph can be used to either enlarge or reduce, for this design I have chosen to make it reduce only, for a number of reasons;
Due to the simple pivots I’m using, accuracy won’t be as good as it could be and when enlarging and errors are magnified, which depending on how loose the pivots are, might be visible in the enlarged engraving.
For enlarging, the accuracy you have to move the tracing point with is also increased by the magnification factor, for reducing, any inaccuracies are halved.
We use mechanical advantage of the levers, by reducing we move our tracing point twice the distance that the engraver will move, this effectively doubles the force, which is important as as the engraving tool cuts, you must manually resist any cutting forces it generates.
Supplies:
I’ve listed here what I used but most of this can be adjusted to suit what you have to hand.
Timber 20x30mm 1.2m long
4mm Wood Screw 50mm long
M6 Countersunk or Hexagon head bolts
M6 Washers
3mm Hardboard 75mm x 75mm
TImber 75mm x 75mm x 50mm
A rotary tool”