
“The new Raspberry Pi Pico is very different from a traditional Raspberry Pi. Pico is a microcontroller, rather than a microcomputer. Unlike a Raspberry Pi it’s a platform you develop for, not a platform you develop on.
But you still have choices if you want to develop for Pico, because there is both a C/C++ SDK and an official MicroPython port. Beyond that there are other options opening up, with a port of CircuitPython from Adafruit and the prospect of Arduino support, or even a Rust port.
Here I’m going to talk about how to get started with the C/C++ SDK, which lets you develop for Raspberry Pi Pico from your laptop or Raspberry Pi.
I’m going to assume you’re using a Raspberry Pi; after all, why wouldn’t you want to do that? But if you want to develop for Pico from your Windows or Mac laptop, you’ll find full instructions on how to do that in our Getting Started guide.
Blinking your first LED
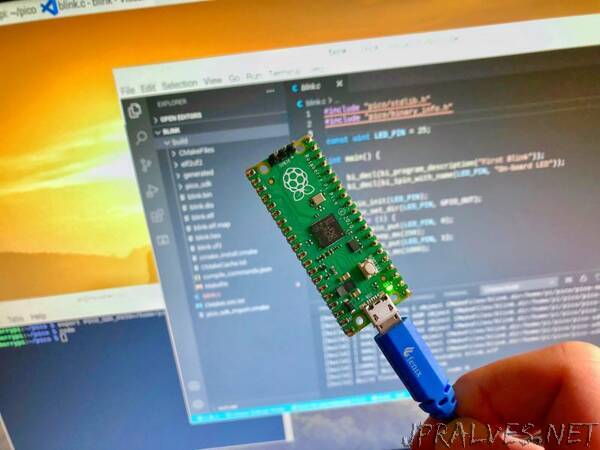
When you’re writing software for hardware, the first program that gets run in a new programming environment is typically turning an LED on, off, and then on again. Learning how to blink an LED gets you halfway to anywhere. We’re going to go ahead and blink the onboard LED on Pico, which is connected to pin 25 of the RP2040 chip.
We’ve tried to make getting started with Raspberry Pi Pico as easy as possible. In fact, we’ve provided some pre-built binaries that you can just drag and drop onto your Raspberry Pi Pico to make sure everything is working even before you start writing your own code.
Go to the Getting Started page and click on the “Getting started with C/C++” tab, then the “Download UF2 file” button in the “Blink an LED” box.
A file called blink.uf2 will be downloaded to your computer. Go grab your Raspberry Pi Pico board and a micro USB cable. Plug the cable into your Raspberry Pi or laptop, then press and hold the BOOTSEL button on your Pico while you plug the other end of the micro USB cable into the board. Then release the button after the board is plugged in.
A disk volume called RPI-RP2 should pop up on your desktop. Double-click to open it, and then drag and drop the UF2 file into it. The volume will automatically unmount and the light on your board should start blinking.
Congratulations! You’ve just put code onto your Raspberry Pi Pico for the first time. Now we’ve made sure that we can successfully get a program onto the board, let’s take a step back and look at how we’d write that program in the first place.”