
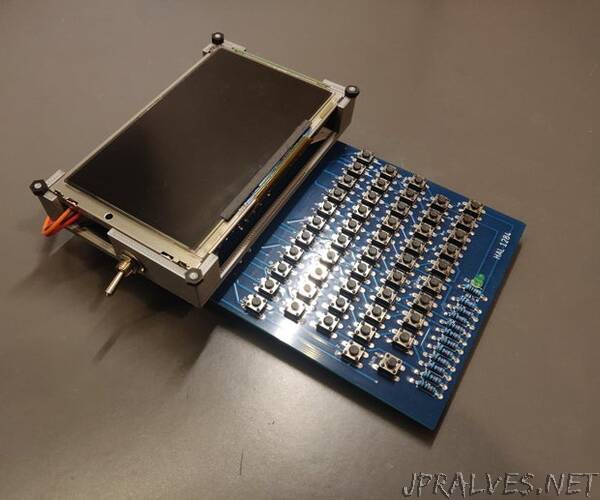
“This Instructable describes my process of building a small handheld computer running BASIC. The computer is built around the ATmega 1284P AVR chip, which also inspired the silly name for the computer (HAL 1284).
This build is HEAVILY inspired by the amazing project found here and the SuperCON BASIC Badge.
The computer runs a modified version of TinyBasic, although much of the software is based on the project by dan14. You can of course follow this Instructable, or even better, improve on it since I made a few mistakes.
For this project, I also created a manual. It mentions some bugs and specifics for the chosen monitor but most importantly, it has the list of BASIC operations.
or the main IC:
ATmega 1284P
16MHz Crystal
2x 22pf Ceramic Capacitor
10KΩ Resistor (For reset pull up)
4-pin button (For reset)
470Ω Reistor (For composite video)
1kΩ Resistor (For composite video sync)
3-pin jumper (For video signal)
Passive Buzzer
For keybaord control:
ATmega 328P (Like the ones used in the Arduino Uno)
16MHz Crystal
2x 22pf Ceramic Capacitor
12x 10KΩ Resistor (For reset pull up and buttons)
51x 4-pin button (For the actual keyboard)
For power:
L7805 Voltage Regulator
3mm LED
220Ω Resistor (For LED)
2x 0.1µF Electrolytic Capacitor
0.22 µF Electrolytic Capacitor (You could substitute this 0.22 and one 0.1 for one 0.33. I’ve also been told that the values doesn’t really matter, but I’m not great with capacitors)
2x 2-pin jumper (For power input and for main switch)
GPIO (Maybe add a couple more grounds):
7-pin Jumper
2x 8-pin Jumper
2-pin Jumper (For 5V and GND)
3-4-pin Jumper (For Serial Communication)
Non-PCB:
4” LCD Display with Composite Video (Mine had an input voltage between 7-30V)
3D printed holder for display
Some sort of switch”