
“If you have two (x2) micro:bits, have you thought of using them for remotely controlling an RC car? You can control an RC car by using one micro:bit as the transmitter and another one as the receiver.
When you use MakeCode editor for coding a micro:bit, you can find an extension named Radio which allows one of your micro:bit to broadcast data over the air to another micro:bit in the same group. You can easily send and receive data using Radio extension for many projects.
In this tutorial, we will learn how to use two (x2) micro:bits to remotely control an RC car. We will check the steps to set up two (x2) micro:bits and use MakeCode editor for explaining how the sample files are coded. You can download ready-to-play sample codes in this project and you don’t need to worry about coding everything from scratch. You can always customize the sample codes later for your own learning purposes.
Supplies:
Let’s get started! For the transmitter and the receiver, we will use two (x2) micro:bits. For batteries, we recommend using new and single-use 1.5V AA and AAA batteries.
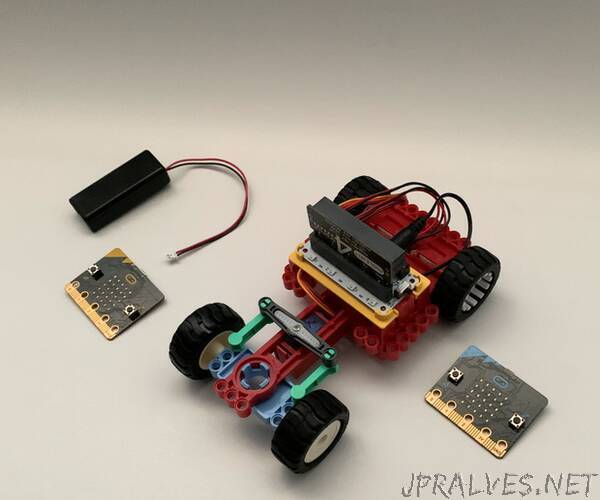
micro:bit x2
battery case x1
1.5V AAA batteries x2 (for the battery case)
For the toy car in this project, we will use Valenta Off-Roader RC car. Valenta Off-Roader is a micro:bit powered RC car. It is Lego Technic compatible and equipped with two (x2) micro gear motors on the rear wheels and one (x1) built-in steering servo based on Roberval balance arm mechanism.
Valenta Off-Roader x1
1.5V AA batteries x4 (for the car)”