
“Since I started with the studies of Arduino and the Maker Culture I have liked to build useful devices using junk and scrap pieces such as bottle caps, pieces of PVC, drink cans, etc. I love to give a second life to any piece or any material. A large part of the materials used here are scrap removed from some equipment and recycled
When I started a project of a weather station for my own I realized that the measurement of the intensity and direction of the wind would not be very easy or cheap. After several months I present to you this project that uses mostly recycled materials and very cheap electronic parts easily found in any electronic store.
This post has 2 parts.
Part 1 - Construction of the devices Anemometer and Wind Vane Direction.
Part 2 - The sketch using Arduino IDE for Esp8266 Nodemcu and transmission to ThingSpeak .
See the video to know the final solution.
How to build your own Anemometer using Hall Effect Sensor and Reed Switches
Project description
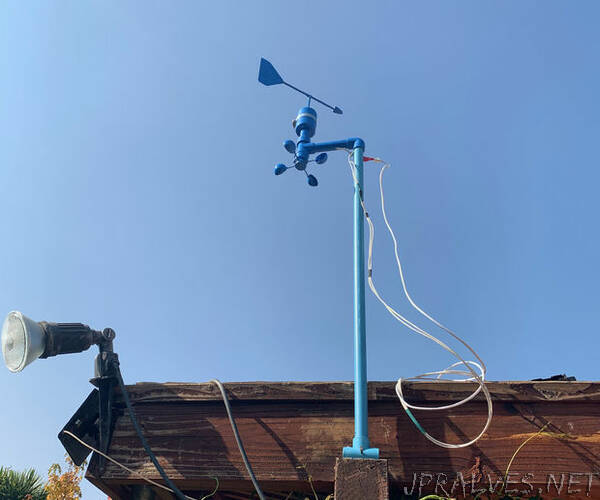
The anemometer is a device capable of measuring the wind speed and its direction. Using a Hall Effect sensor we will be able to count how many rotations the cups give in a period of time. The intensity of the wind is proportional to the speed of rotation of the axis. With some simple physics equations, you can determine the linear velocity of the wind, at that moment. We will explain all of them in part 2.
And the direction of the wind we will measure through a windshield with a neodymium magnet and reed switches. The vane points in the direction of the wind and the magnet attached to it will connect the reed switches allowing the electric current to pass through the connection (or connections). Circuits that have positive current indicate the direction of the wind, like a compass.
We have 8 circuits that will emulate 16 directions : 4 cardinal and 4 collateral points when 1 switch is activated (N, NE, E, SE, S, SW, W, NW) and when 2 switches are activated simultaneously we have 8 sub collateral points (NNE, ENE, ESE, SSE, SSW, WSW, WNW, NNW).
The wind speed and direction will be calculated and determined by a sketch in the nodemcu. But this will be explained in part 2. Now let’s go to the hardware assembly.”