
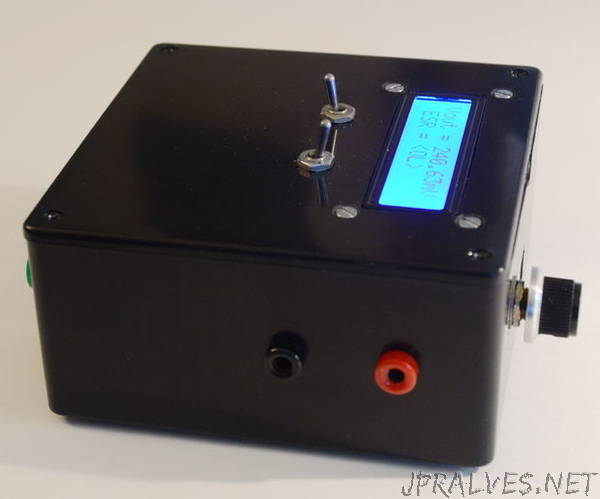
“CAP-ESR-FREQ meter with an Arduino Duemilanove.
In this instructable you can find all neccessary information about making a metering instrument based on an Arduino Duemilanove. With this instrument you can measure capacitor values in nanofarads and microfarads, the equivalent serie resistance (ESR value) of a capacitor and last but not least frequencies between 1 Herz an 3 MegaHerz. All three designs are based upon descriptions I found on the Arduino forum and on Hackerstore. After adding some updates I combined them into one instrument, controlled with just one Arduino ino program. The different meters are selected via a three position selector switch S2, connected to pins A1, A2 and A3. ESR zeroing and meter selection reset is done via a single pushbutton S3 on A4. Switch S1 is the power ON/OFF switch, needed for 9 V DC battery power when the meter is not connected to a PC via USB.These pins are used for input:A0: esr value input.A1: capacitor meter selection.A2: ESR meter selection. A3: frequency meter selection.A4: the esr zeroing and general reset button.A5: capacitor input.D5: frequency input.
The meter uses a Liquid Crystal Display (LCD) based on the Hitachi HD44780 (or a compatible) chipset, which is found on most text-based LCDs. The library works in 4- bit mode (i.e. using 4 data lines in addition to the rs, enable, and rw control lines). I started this project with an lcd with only 2 datalines the (SDA and SCL I2C connections) but unfortunally this conflicted with the other software I used for the meters. First I will explain he three different meters and finally the assembly instructions. With each type of meter you can also download the separate Arduino ino file, if you want to only install that specific type of meter.”