
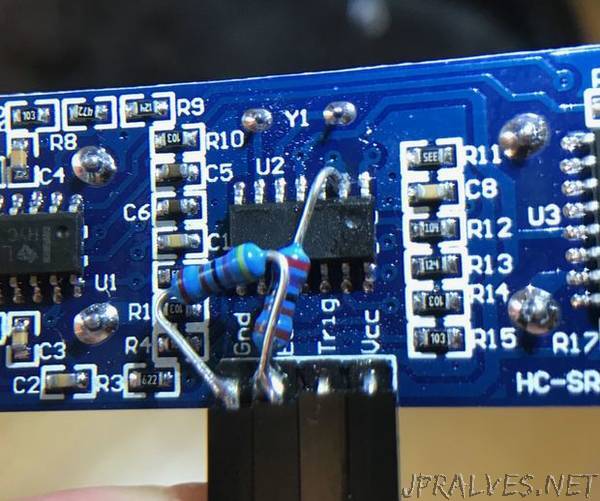
“TL;DR: On the sensor, cut the trace to the Echo pin, then re-connect it using a voltage divider (Echo trace -> 2.7k -> Echo pin -> 4.7k -> GND).If you are anything like me, you have come to know and like the HC-SR04 as the de facto standard for low-cost ultrasonic distance sensing for 5V-based Arduino projects. That’s why I have quite a few of them lying around here.
But the world of hobby electronics has been steadily moving from 5V towards 3.3V. The Raspberry Pie and many other boards, like those based on the ESP8266, ESP32 or boards like the Particle Photon, are working with 3.3V logic on their input/output pins.
If we connect the sensor to 5V power and at the same time to 3.3V pins, the Echo pin’s output will also be 5V and will most likely destroy the 3.3V pins of our microcontroller board. We could try to connect an as-is HC-SR04 to 3.3V power and will be able to get measurements, but unfortunately, these will often be much less accurate.
The solution is to still connect the sensor to 5V VCC, but to make sure that the Echo signal that reaches the microcontroller only has 3.3V by creating a voltage divider using two resistors. Lucky for us, the HC-SR04’s Trigger pin does not need 5V and also the accepts the 3.3V that we get from our microcontroller’s pins.
With above description and links, you most likely already have enough information to create a voltage divider as part of your circuit on a breadboard and hook up an ultrasonic sensor correctly.
If you want to learn how to modify one or several HC-SR04s so they are 3.3V-ready as self-contained units, without any extra circuitry, read on below.”