
“A few months back, I was wondering how weather stations work. How do they acquire and display data? I decided it would be a great IoT project to make.
I did a little research and found some commercial systems I could base mine off, as well as some online tutorials to help with some of the sensor or Raspberry Pi concepts.
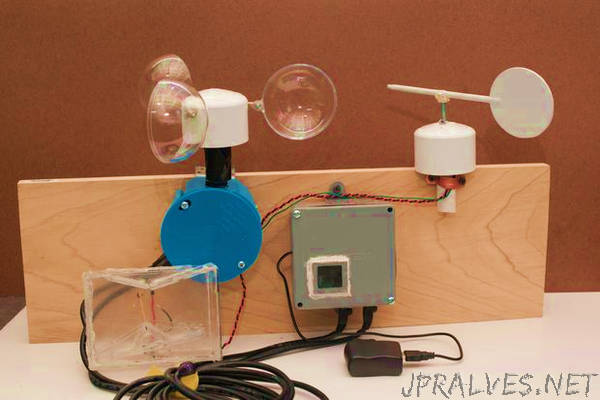
This is a complete Raspberry Pi weather system with just the base Raspberry Pi hardware, camera, and some assorted analog and digital sensors to make our measurements. No buying pre-made anemometers or rain gauges — we are making our own!
Features:
- Records information to RRD and CSV, so it can be manipulated or exported/imported to other formats
- Uses the Weather Underground API to get info like historical highs and lows, moon phases, and sunrise/sunset
- Uses the Raspberry Pi Camera to take a picture once a minute (which you can use to make time-lapse videos)
- Has webpages that display the data for the current conditions and some historical conditions (last hour, day, seven days, month, year)
- The website theme changes with the time of day (four options: sunrise, sunset, day, and night).
All of the software for recording and displaying the information is on Github and is open source.
This project was a great learning experience for me. I got to really dive into the capabilities of the Raspberry Pi, especially with the GPIO, and I hit some learning pain points as well. I hope you can learn from some of my trials and tribulations.”