
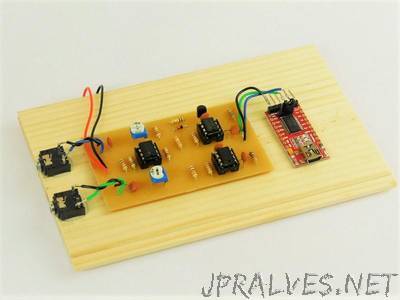
“Before hard disks and floppy drives were widely used by the public, cassette tapes played a vital role in the world of information storage. In this project, we will learn how to build a simple UART to tape interface so you can save/load data from a simple cassette tape. To save data onto tapes, we have to turn our serial data (to/from UART) into audio signals that a tape cassette drive can record. Considering that the frequency range of a tape is abysmal at best, we will have to use low-frequency audio tones. Since the circuit has been designed with simplicity in mind we will use a one tone system where the presence of a tone represents a 1 bit and no tone represents a 0 bit. Other tape systems use frequency key shifting where changes in frequency represent data but that contains more complex circuitry (such as bandpass filters etc). The first step for us is to record data and this is done with a single 555 astable circuit (IC1) and a unity gain buffer (U1A). When the UART input is high, the 555’s reset pin is also high and this results in the 555 producing a square wave that is approximately 4kHz. When the input is low the 555’s reset is also low and this prevents the 555 from oscillating and thus produces no tone. This tone is then buffered via U1A for improving output impedance and this is then fed into a bypass capacitor to produce a tone that oscillates about 0V instead of having a positive offset. This bypassed signal is then directly connected to the input of a cassette recorder and thus when serial data is sent to this circuit, it will result in data encoded tones being recorded to a tape. The second step is to read data that we have saved onto tapes. This is achieved with two circuits; a Schmitt trigger, and a 555 monostable circuit. The Schmitt trigger is used to produce an output if there is a large signal detected from the tape (i.e. the sound of the tone that we recorded), and no output if there is no tone detected (i.e. the 0 from our data). The only problem with this is that when there is a tone, the Schmitt trigger will turn on and off at the same rate as the incoming tone (i.e. 4kHz). Therefore, we have to use a circuit that will remain on when a fast tone is detected. This is where the monostable comes in (IC3). But this is not your ordinary monostable, this monostable is a re-triggerable one! The monostable has been designed to stay on for 300us when triggered but if the 555 is re-triggered during the on state, it will not restart the monostable. This is what the function of Q1 is; to discharge the capacitor C8 which is directly responsible for the monostable on time. Therefore, a repeated signal to the 555 monostable circuit (i.e. the tone) will result in a monostable that stays on until there are no further triggers. The result is an output that matches the original UART signal that was fed in. The circuit works best when using a baud rate of 300 for the UART and is incredibly reliable. RV1 is a potentiometer that adjusts the strength of the output signal while RV2 will adjust the triggering levels of the Schmitt trigger. RV2 is the pot to consider if you are struggling to read data back, but if correctly configured, this circuit is surprisingly accurate with almost no lost bits. The baud rate could be increased but this would require a higher frequency tone and a faster monostable. The monostable time has been chosen to be slightly longer than the period of the tone to ensure that the monostable stays on between repeated triggers.”