“Waking up is hard, especially as a college student who barely gets any sleep. For me alarms are absolutely necessary, because left to myself I would sleep over 12 hours before waking up.
But I have non-scientifically come to the following conclusions after years of relying on alarm clocks:
Loud alarms leave me with a headache, and a tendency to turn them off in my sleep the moment I hear it.If I lower the alarm volume, I automatically tune out the alarm noise after a while.People sharing dorm with me, and especially roommates absolutely hate my alarm.So I looked at alternate methods of waking up. Alarms on vibrate mode works well, since they are much gentler on my ears and head and wake me up over the span of a longer time. But I have to leave my phone right under me, or my pillow, otherwise I would miss the vibration.
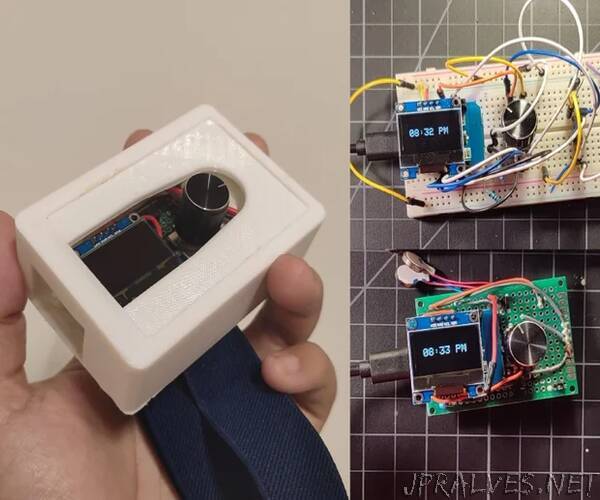
But I liked the idea of using vibration as a method of waking up, and thus I came up with the idea to make the silent alarm clock which I can wear.
Obviously I wanted to be able to use it, but even if I couldn’t use the first prototypes, I wanted to meet certain goals:
Be inexpensive and use parts commonly used in hobbyist electronics projects.Power efficient, nobody likes charging gadgets for niche functions.Be modifiable, through code.Not be an absolute eyesore or pain to put on.This Silent Alarm Clock costed me about 12$ to build. I used a 3d printer to print out a suitable case, but you could definitely go with a small box or any other makeshift solution you can find. The battery should theoretically last about a week, but I haven’t been able to test it to that time limit. It can store alarms in flash memory of the microcontroller, and so it will remember the alarms even if power is disconnected. The Code is pretty modifiable, and doesn’t require subtraction, only addition to the code to add new options.
The build was inexpensive and it was definitely functional, with some areas to be improved, which I will talk about later in the Instructable.
*******
_One more thing. I am a student at Stony Brook University, and I’m putting this Instructable in the Back to School: Student Design Challenge.
_*********
This Instructable is going to be divided into several parts, here is a breakdown:
1) Supplies
2) Implementation of the Silent Alarm Clock
3) Overview of the parts used: Step 2-4
4) Schematic and How the circuit works
5) Coding Overview
6) Code implementation: Step 7-10
7) Testing and Soldering Circuit: Step 11-12
7) 3d Design and Assembly: Step 13-14
8) Troubleshooting tips and files for the project (3d Model, Schematic, Code)”
